I often find myself showing people how to tie bolt snaps to backup lights and hoses, so I thought I’d try and write a description of how to tie the perfect bolt snap. There are a number of ways of doing it, but this is the one I use – it works just fine.
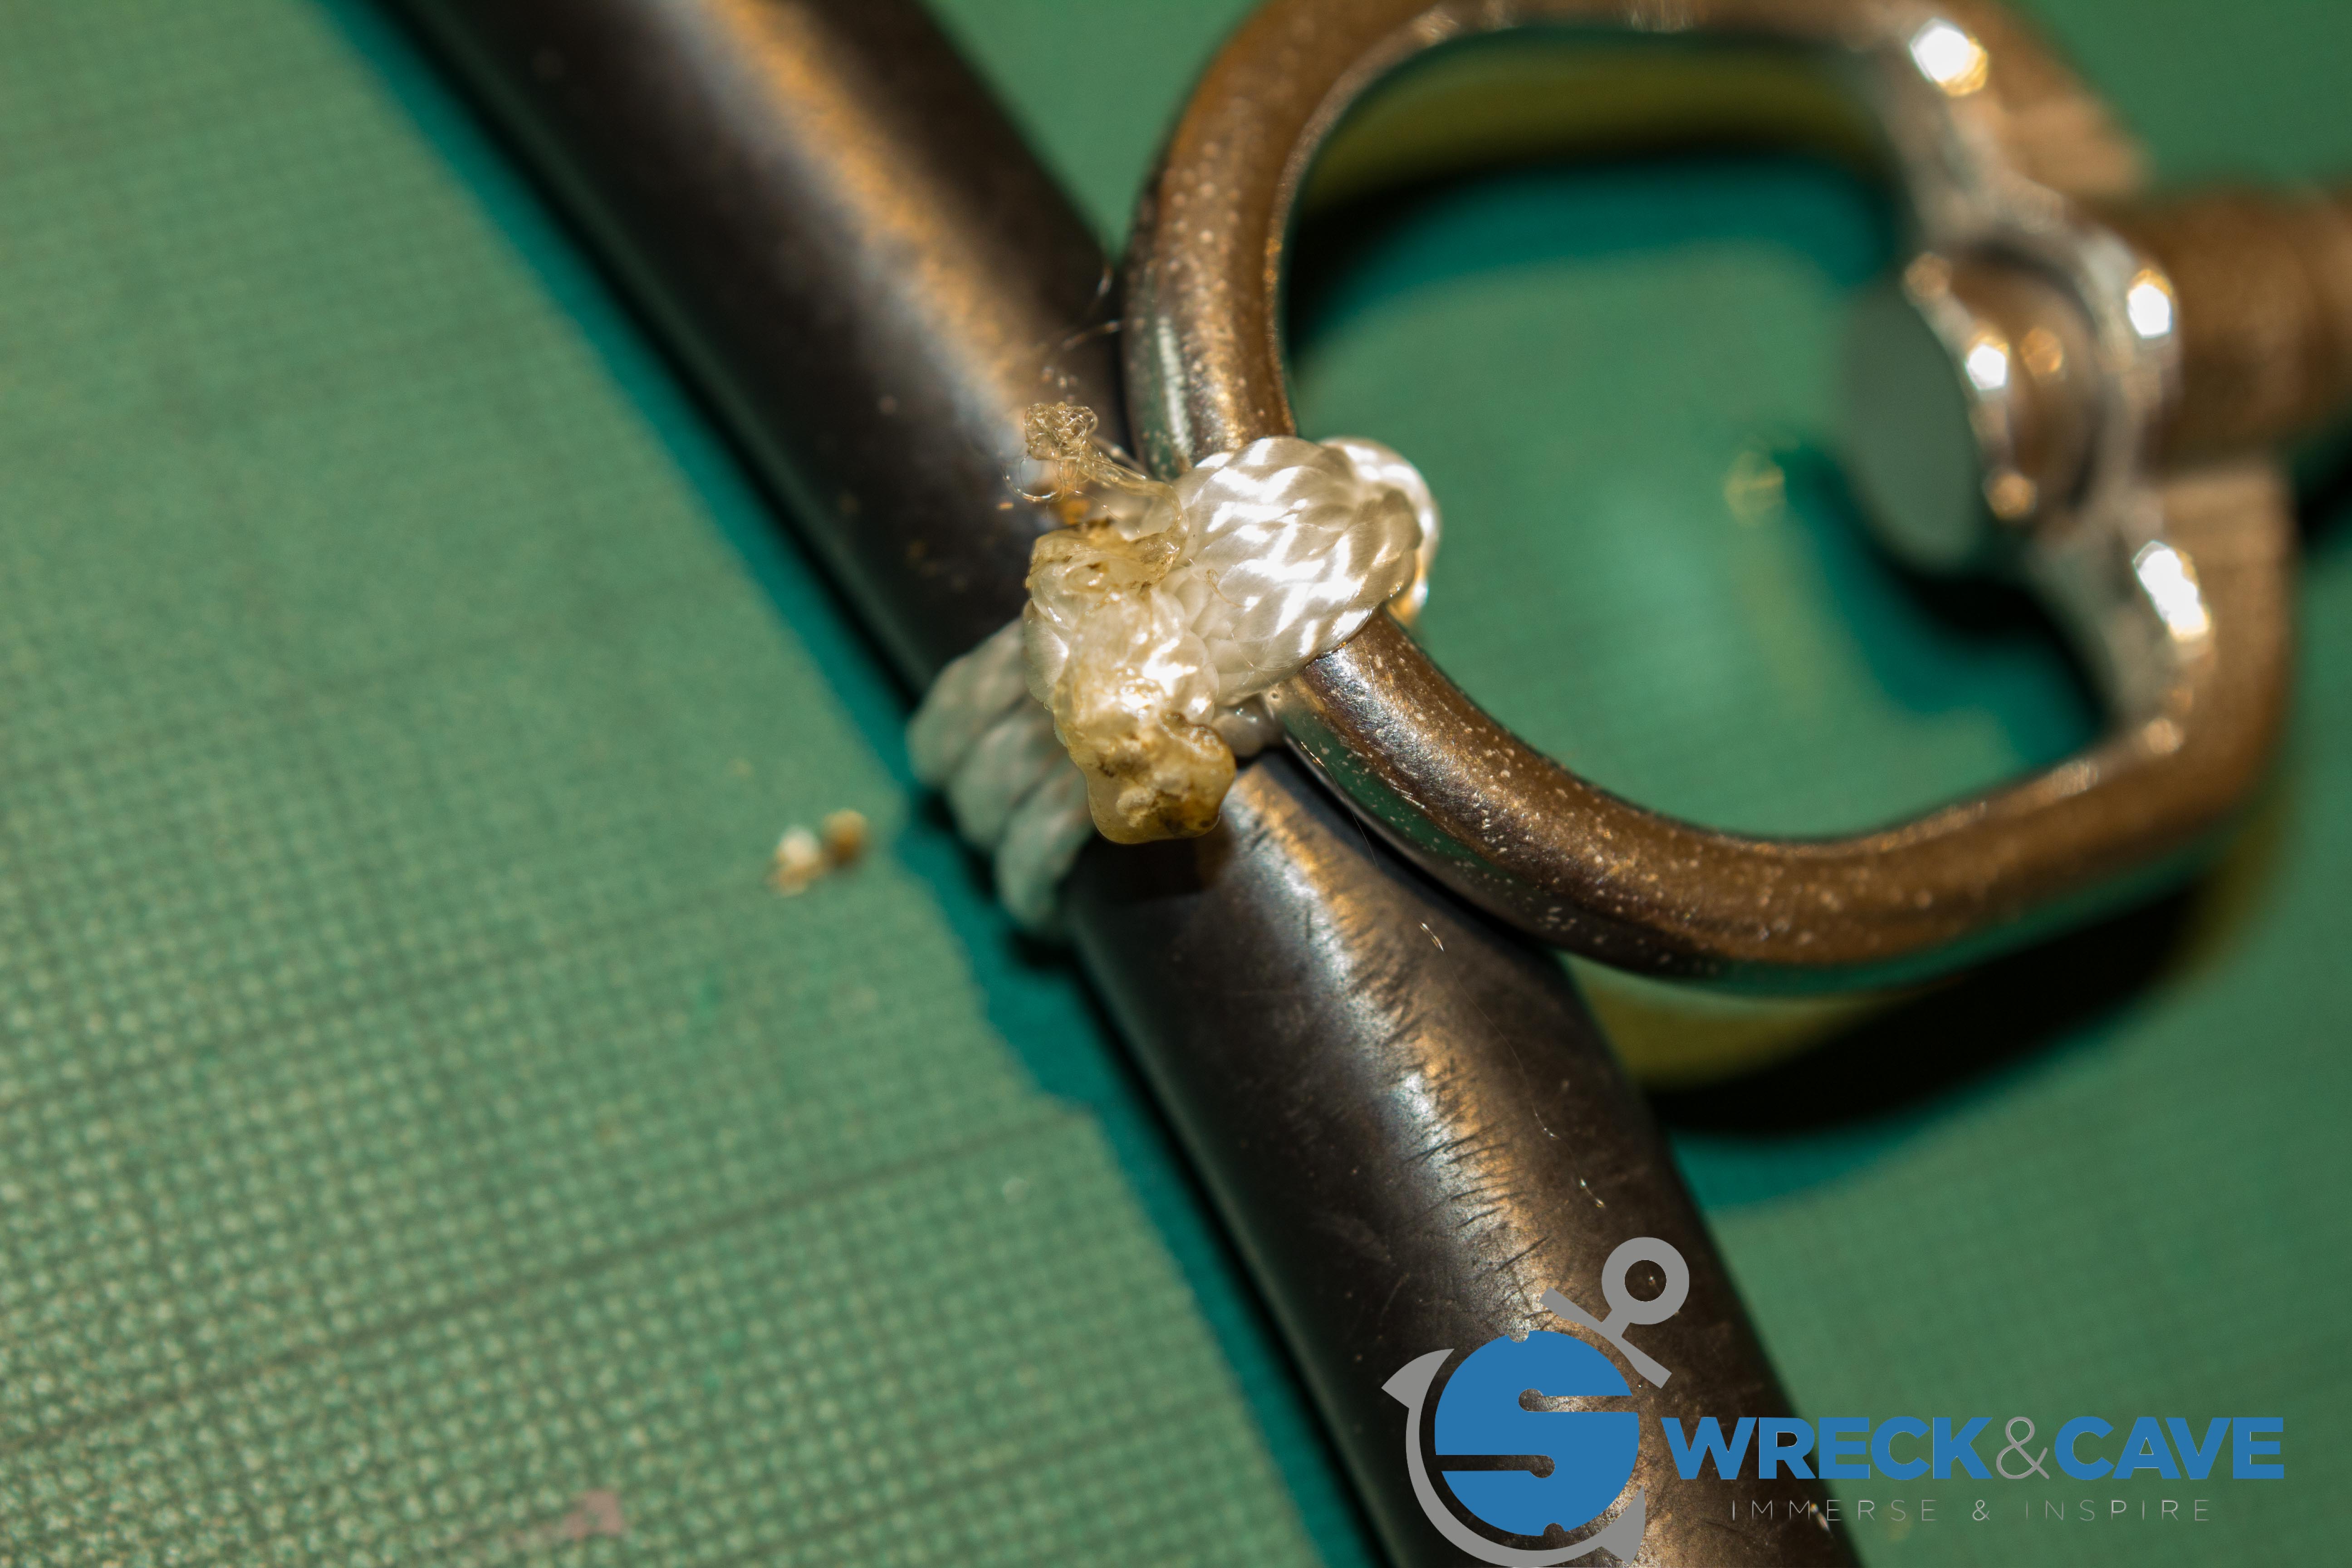
This is the thing we’re trying to produce. It needs to be nice and tight so that it doesn’t slide on the hose, and help the bolt snap “stand up” to make it easier to clip onto the harness d-rings. The same knot is used on backup lights, but it doesn’t have to be quite as tight. So, you will need the following things:
1. 30cm of cave line
2. A bolt snap (!)
3. The hose or light
4. A pair of cutters or a sharp blade
5. A lighter
Getting Started on the Bolt Snap
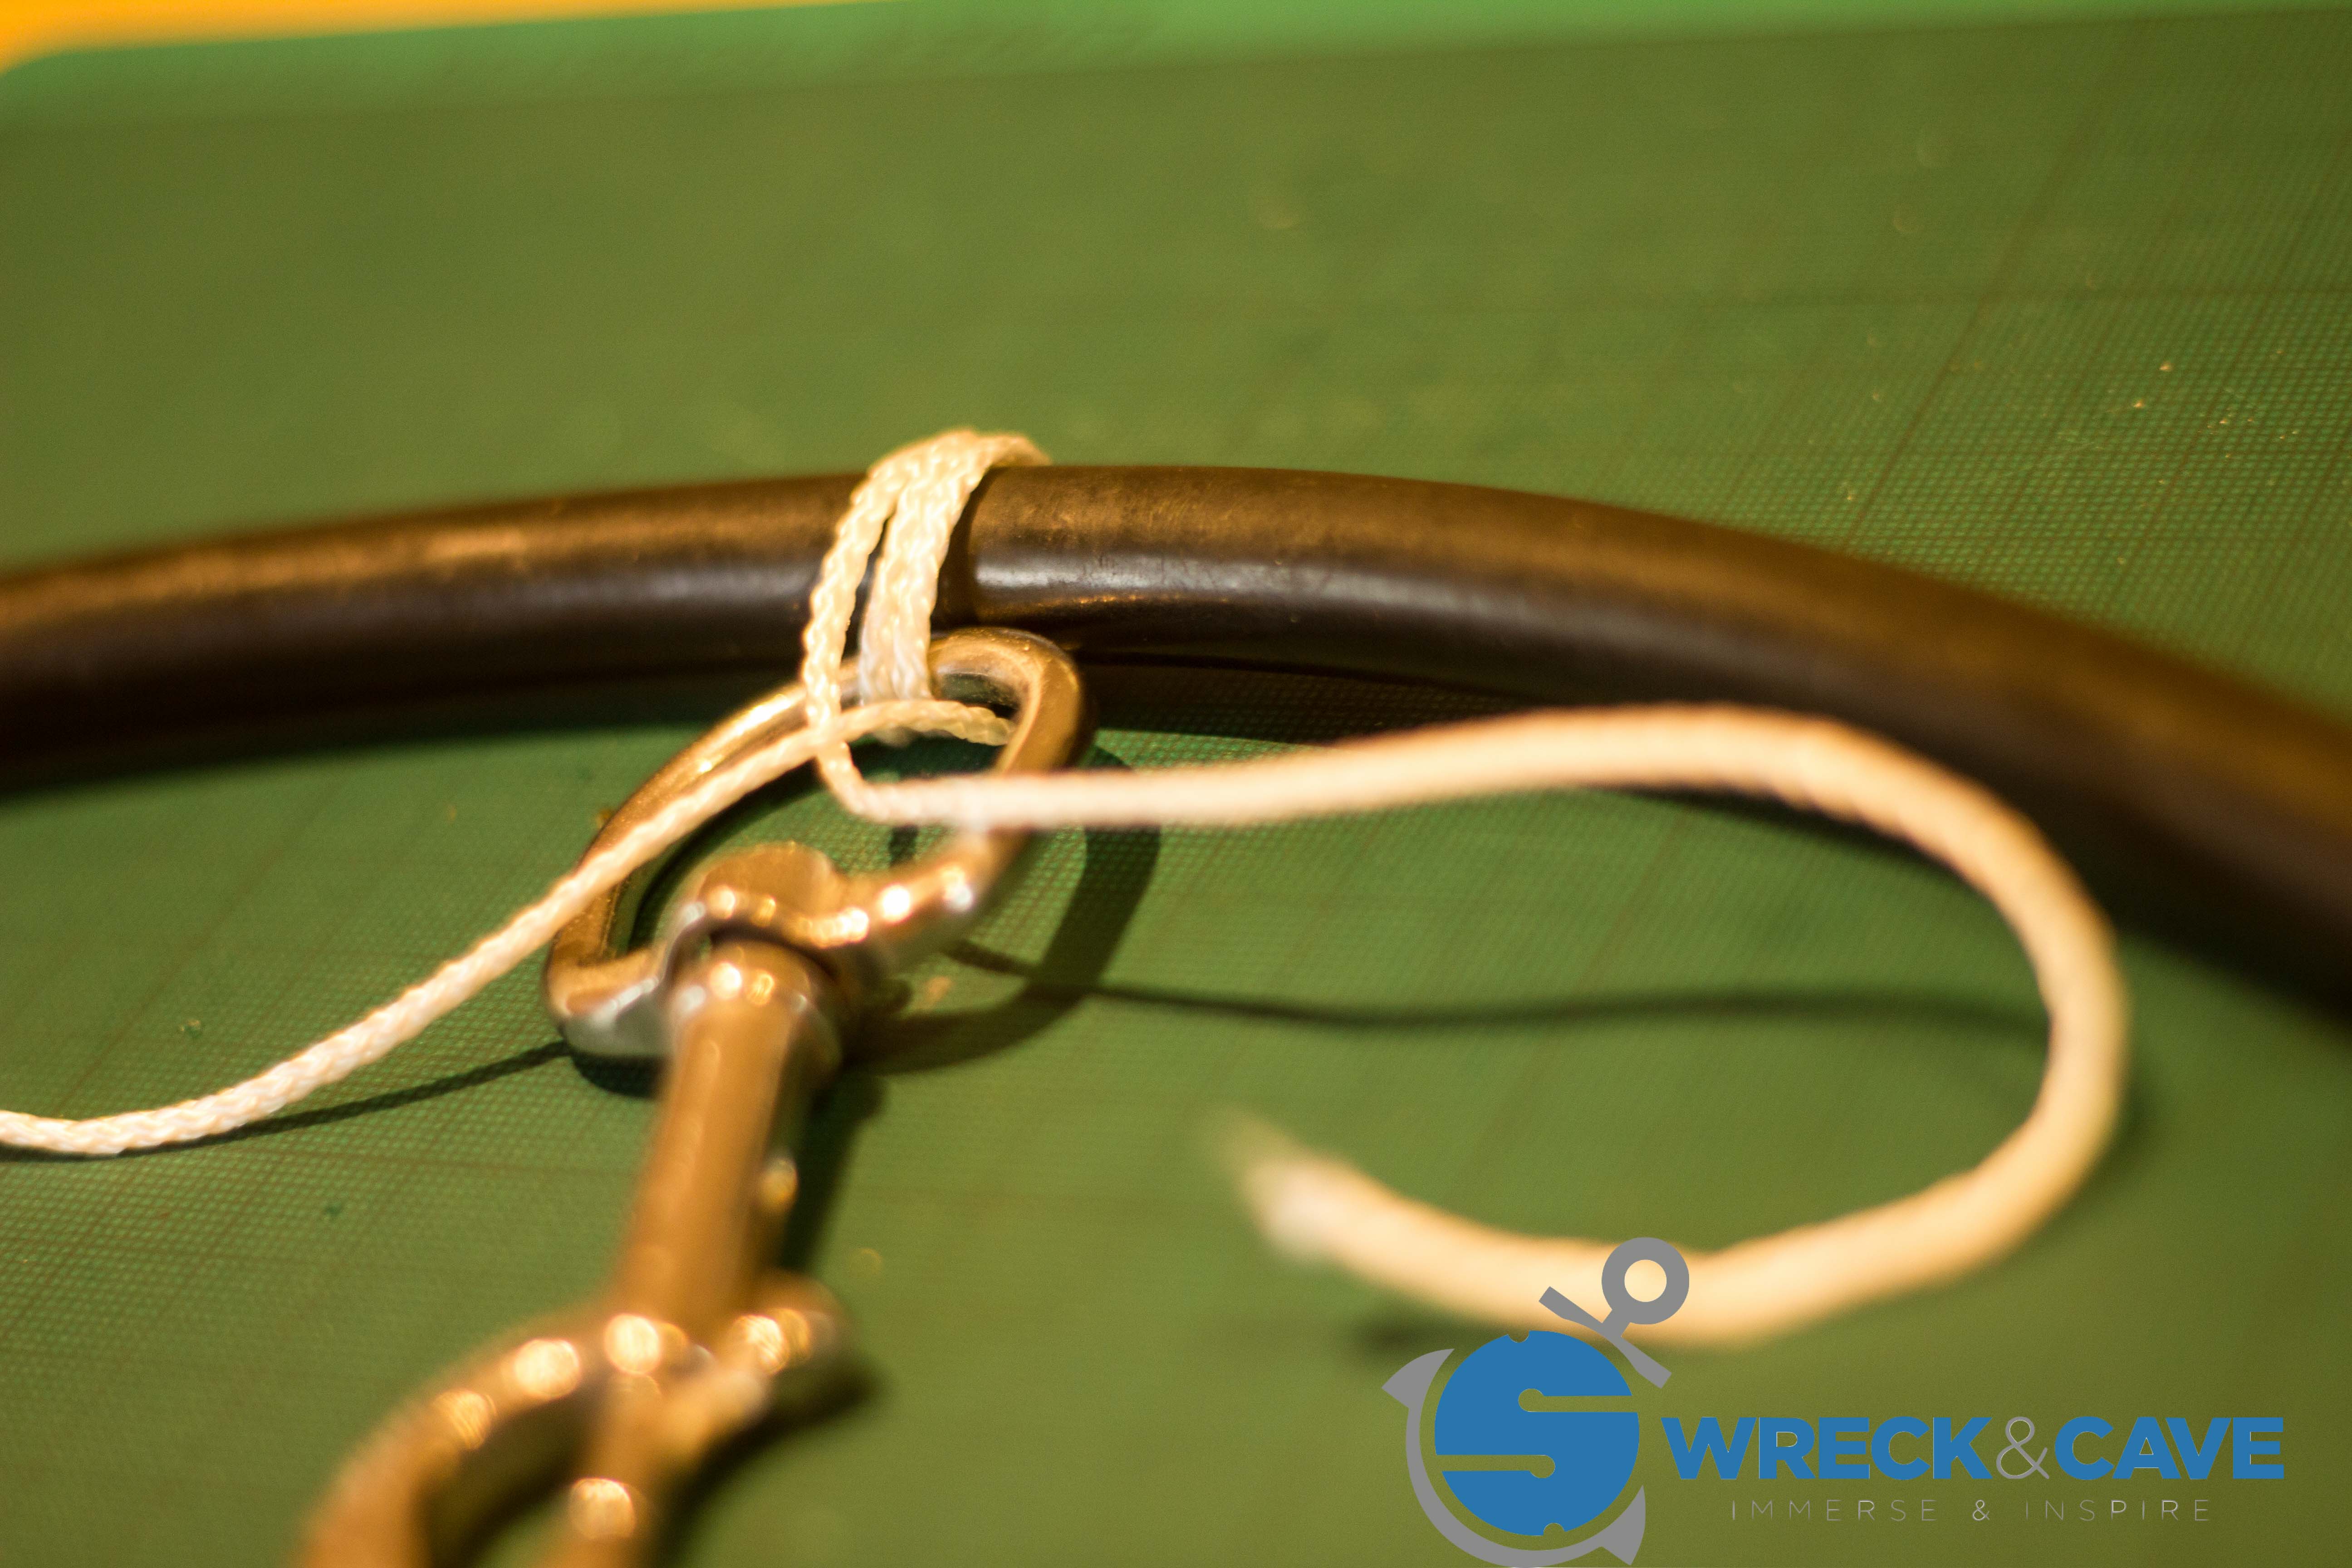
Start by laying out the hose, the boltsnap and the line so that the line is behind the hose, and one end passes through the loop of the boltsnap.
It’s probably easier to look at the picture!

Now put three turns through the bolt snap and the hose. Then pull the loops tight.
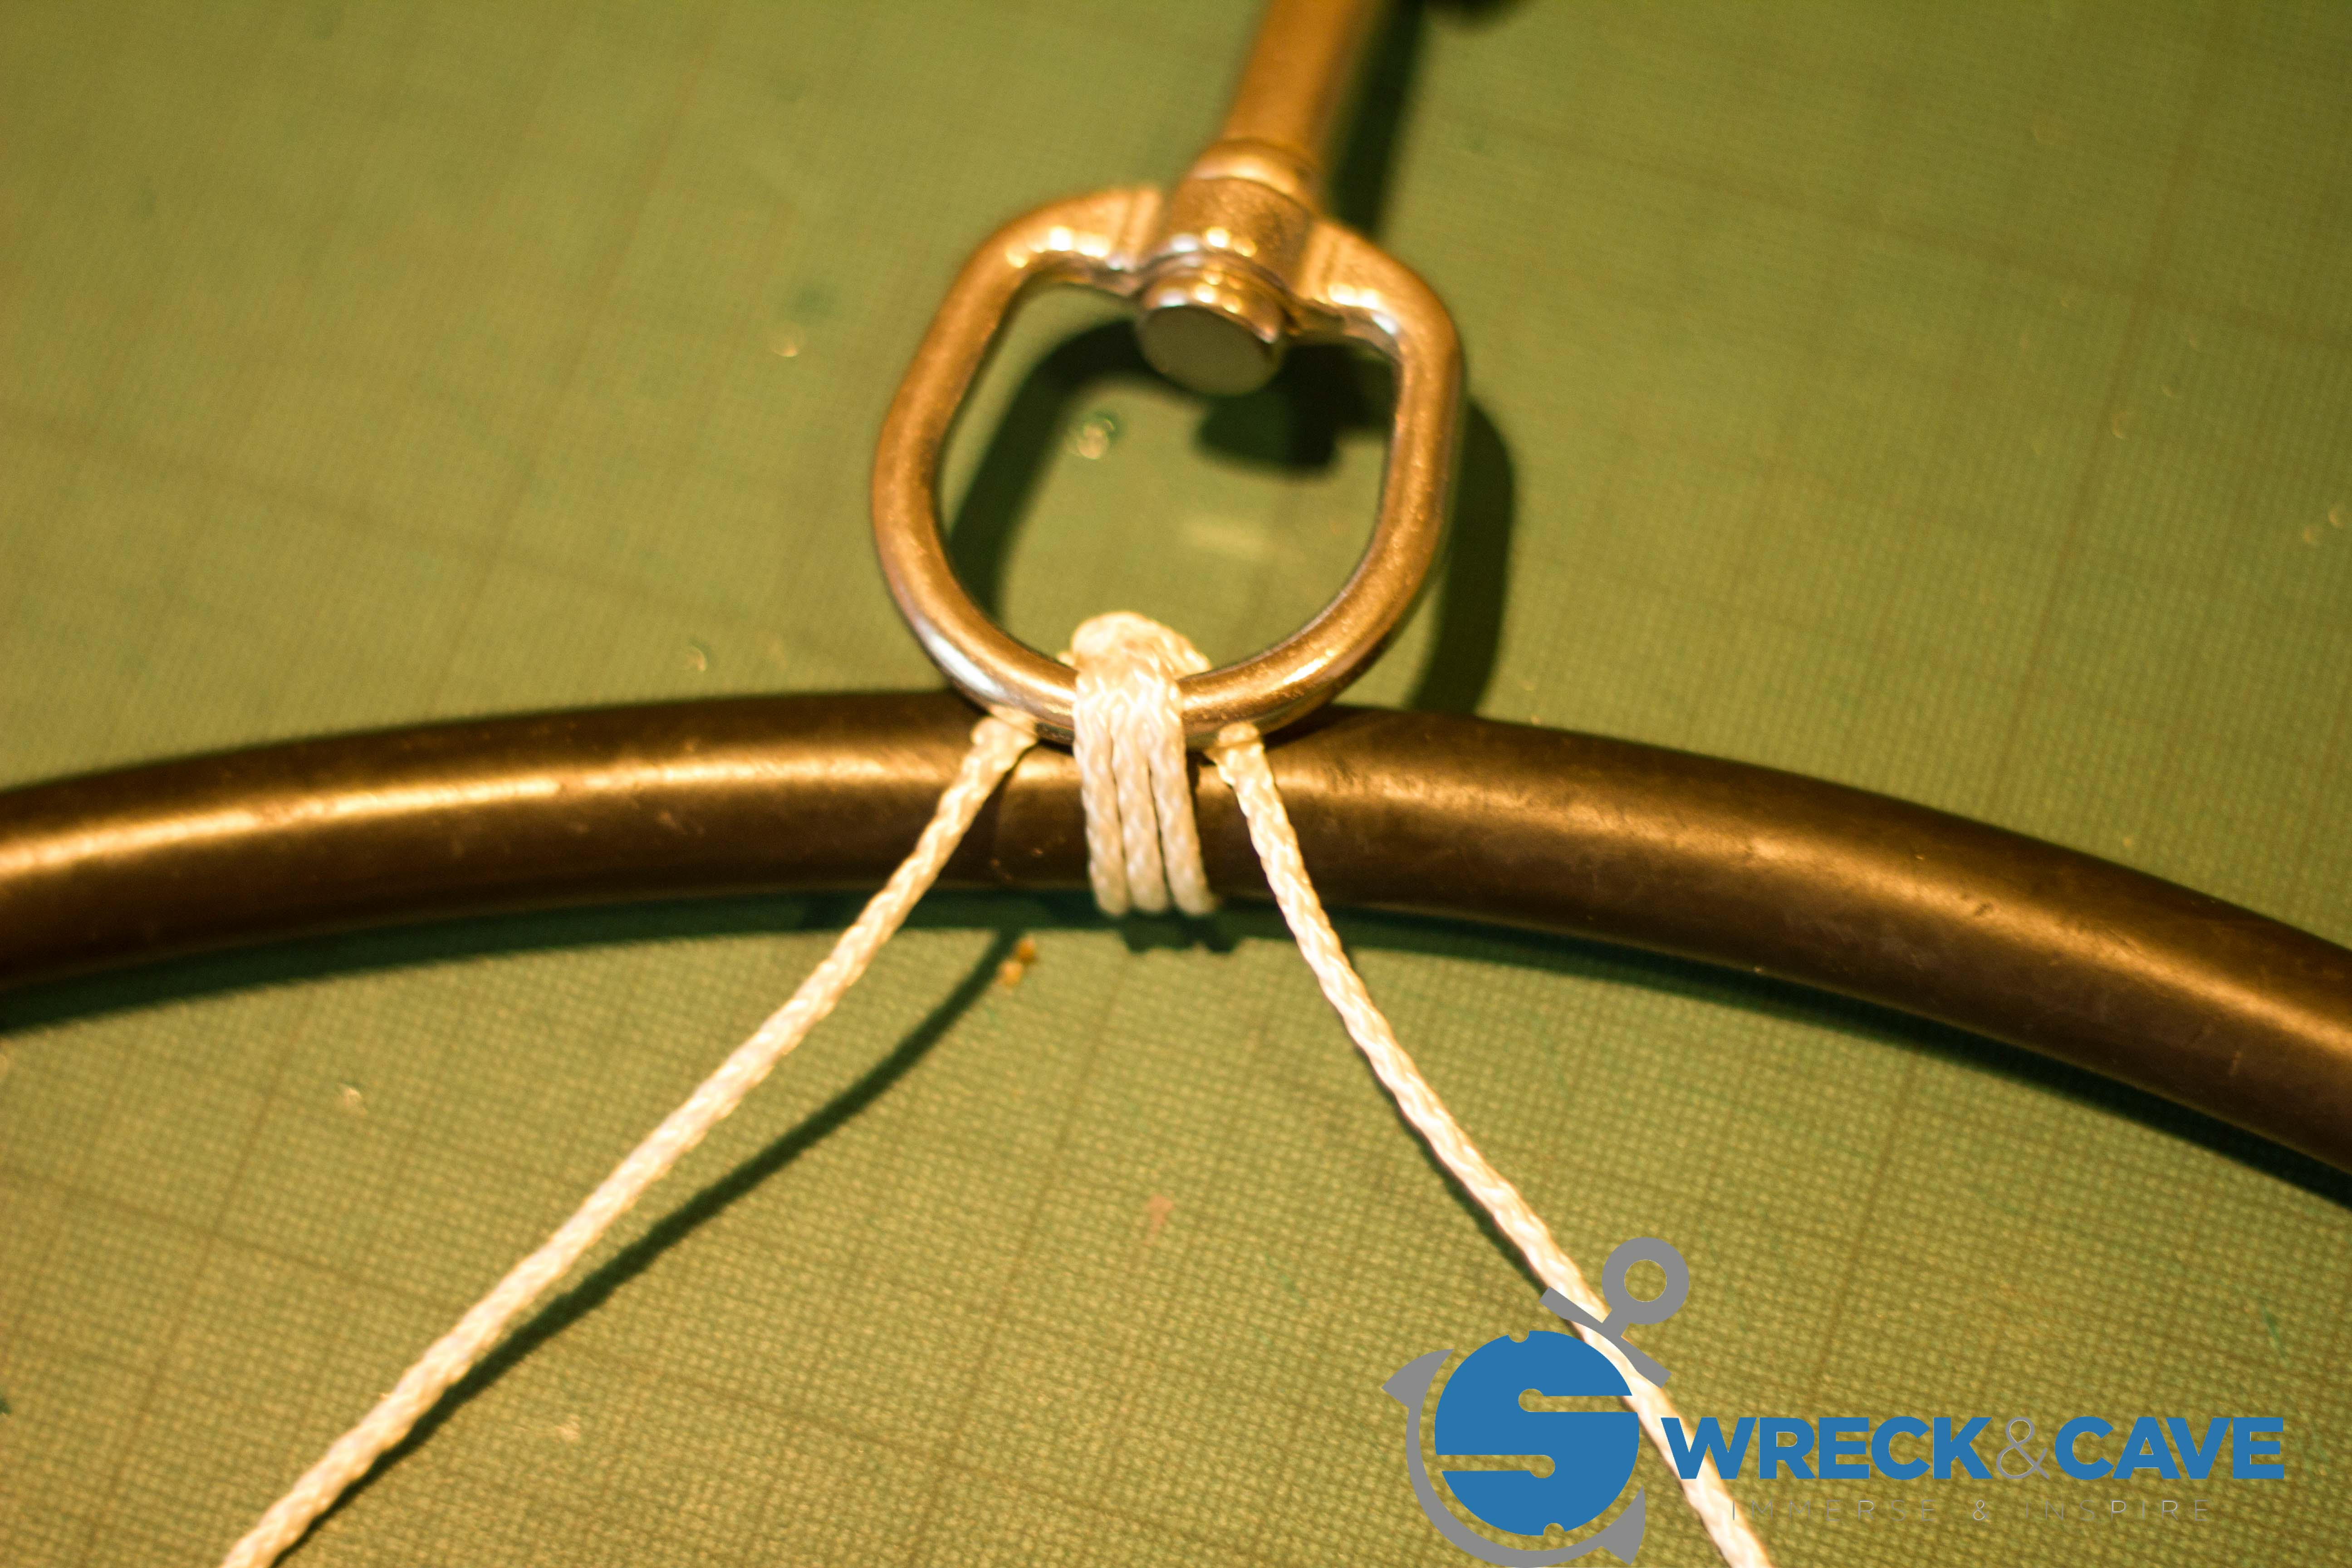
Get the Bolt Snap Knot Started
Next we want to start the knot. We’e going to put a turn around the loops which will apply tension to them, and lock the bolt snap in place. The first step is to cross the two loose ends. Pass the end in the right hand over the end in the left so that it looks like this.
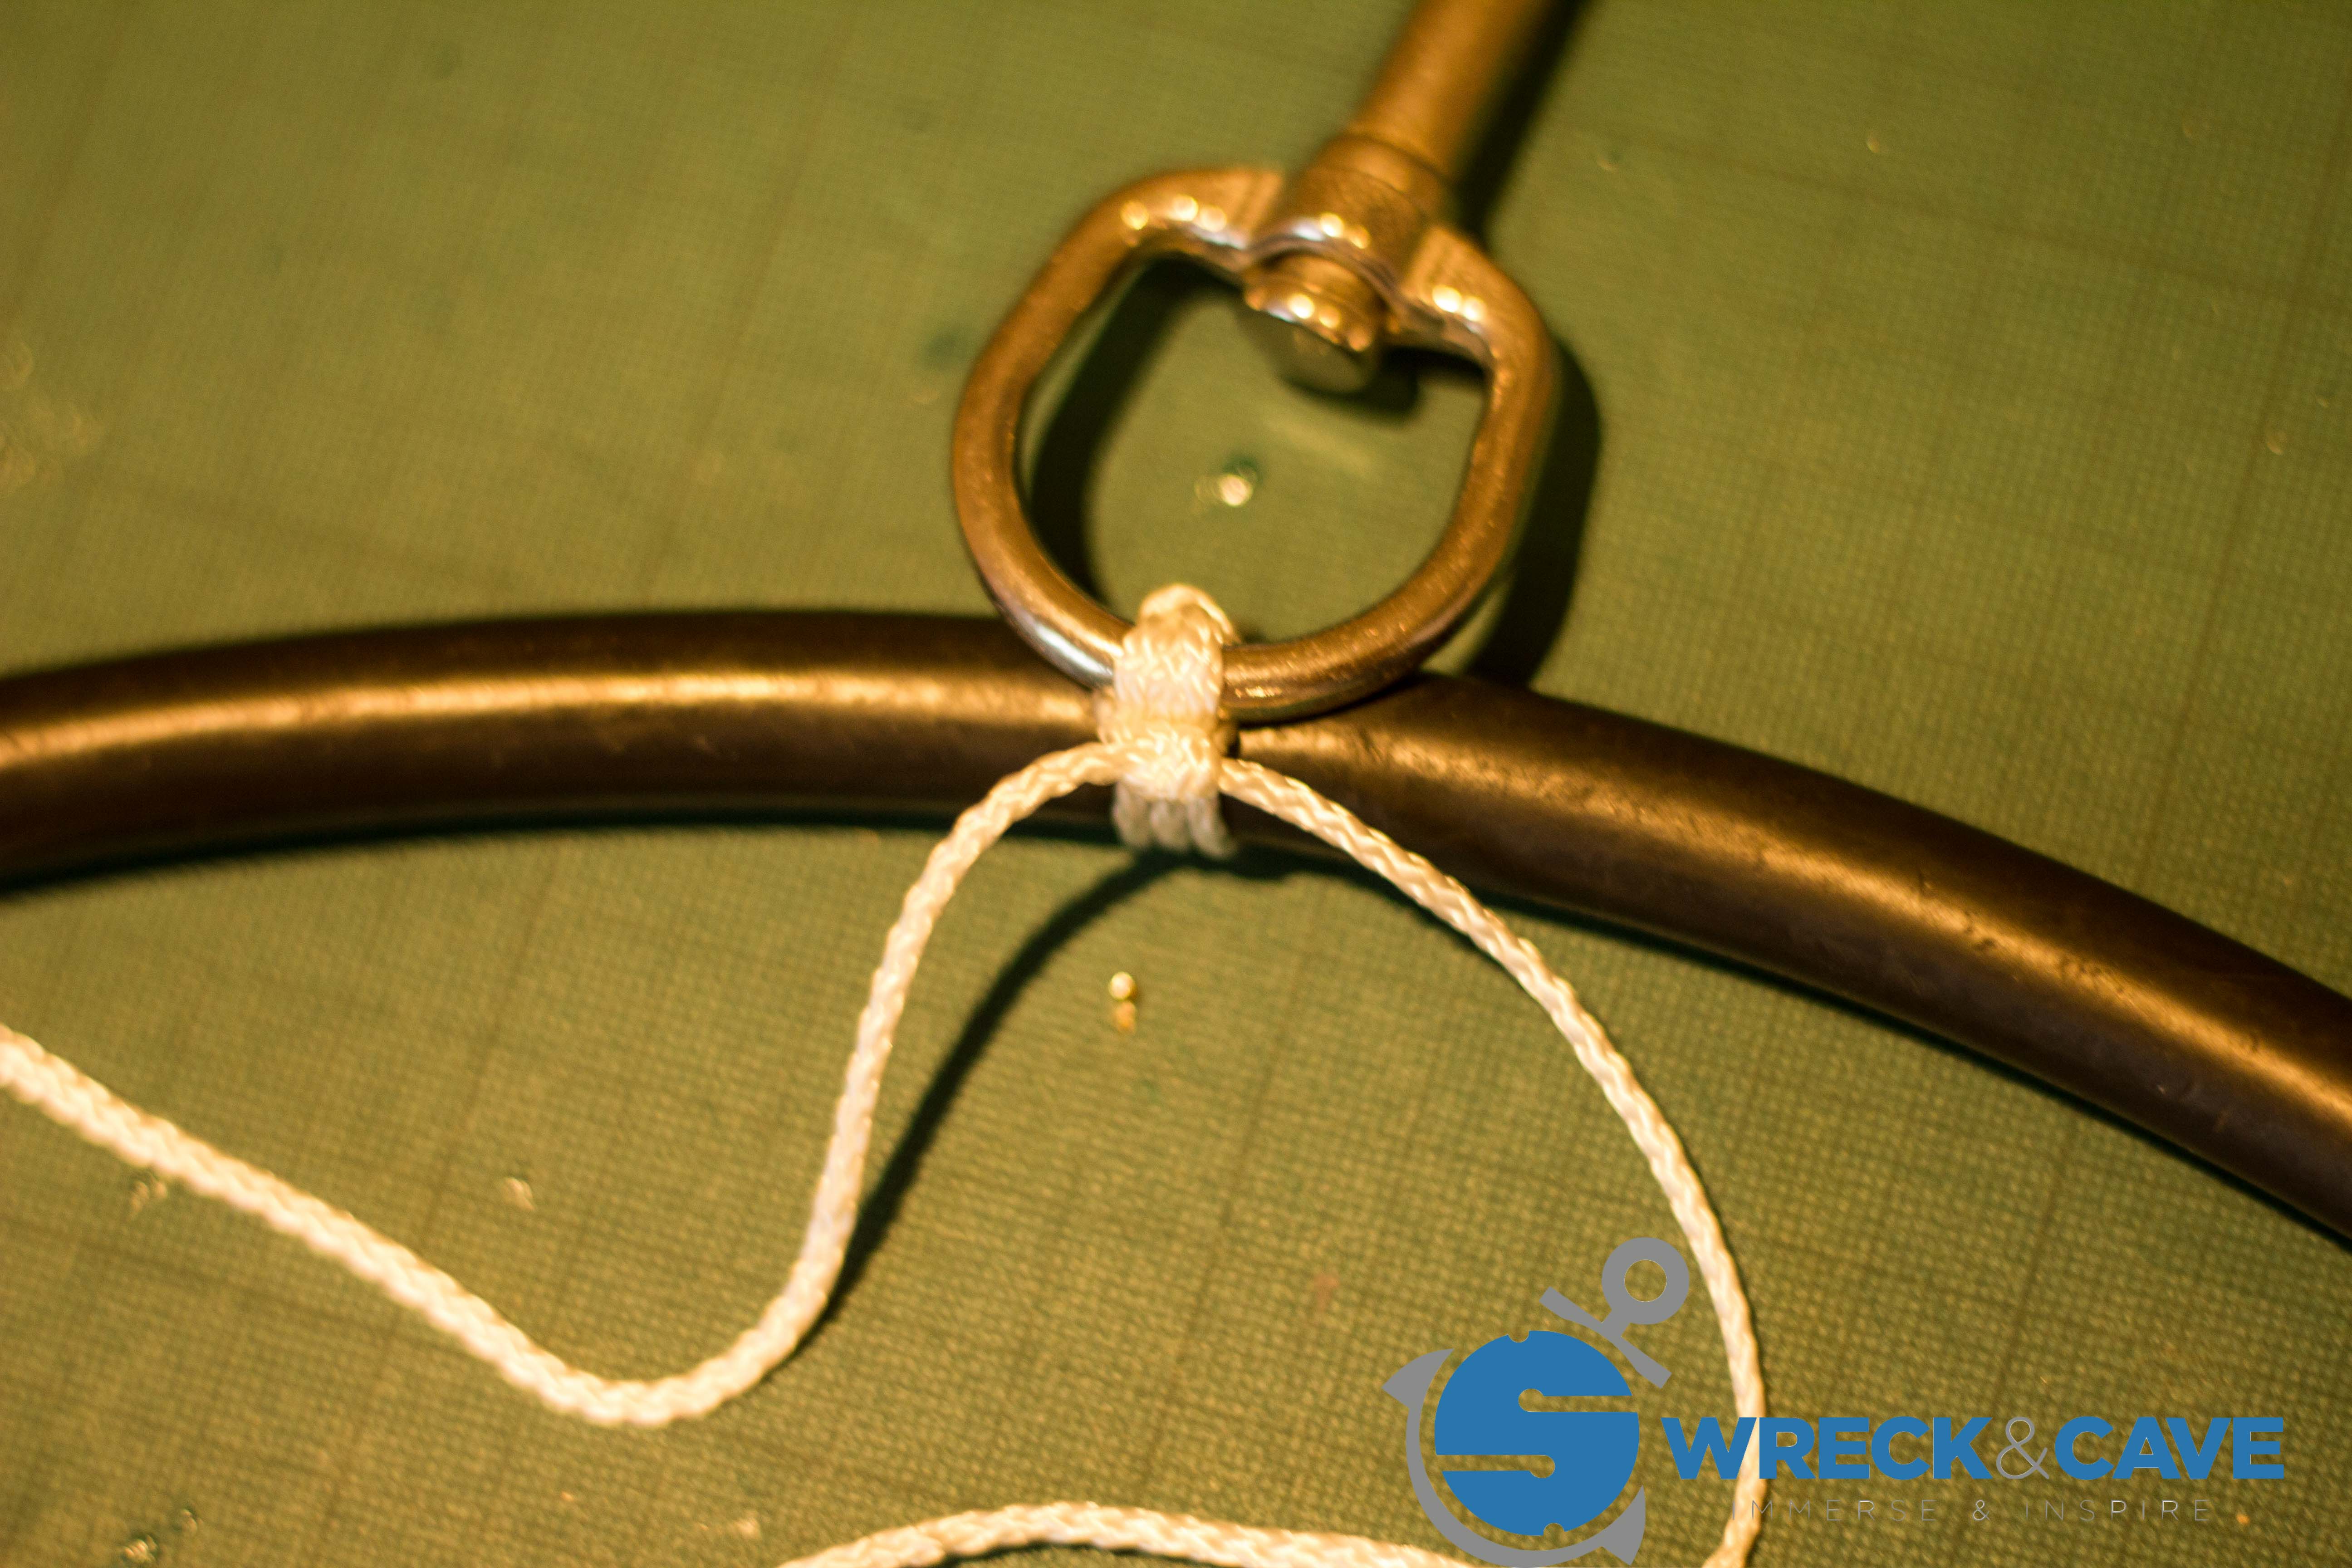
Next, we’re going to tie a knot on the other side to lock the knot. Flip the bolt snap over from one side of the hose to the other. Pull the two loose ends of line over to the opposite side.
Finishing the Knot on the Bolt Snap
The next step is to tie a reef knot to secure the knot. Start by pulling the loose ends to tension the turns. It takes a bit of practice to get this set right, but essentially you want the turns to be pinching together behind the eye of the bolt snap, but not touching.

The next step is to tie the other half of the reef knot. Remember that for a reef knot, it ties “right over left, then left over right” otherwise it’s a granny knot and won’t be stable.When the knot is pulled tight, the reef knot should look square and symmetrical.
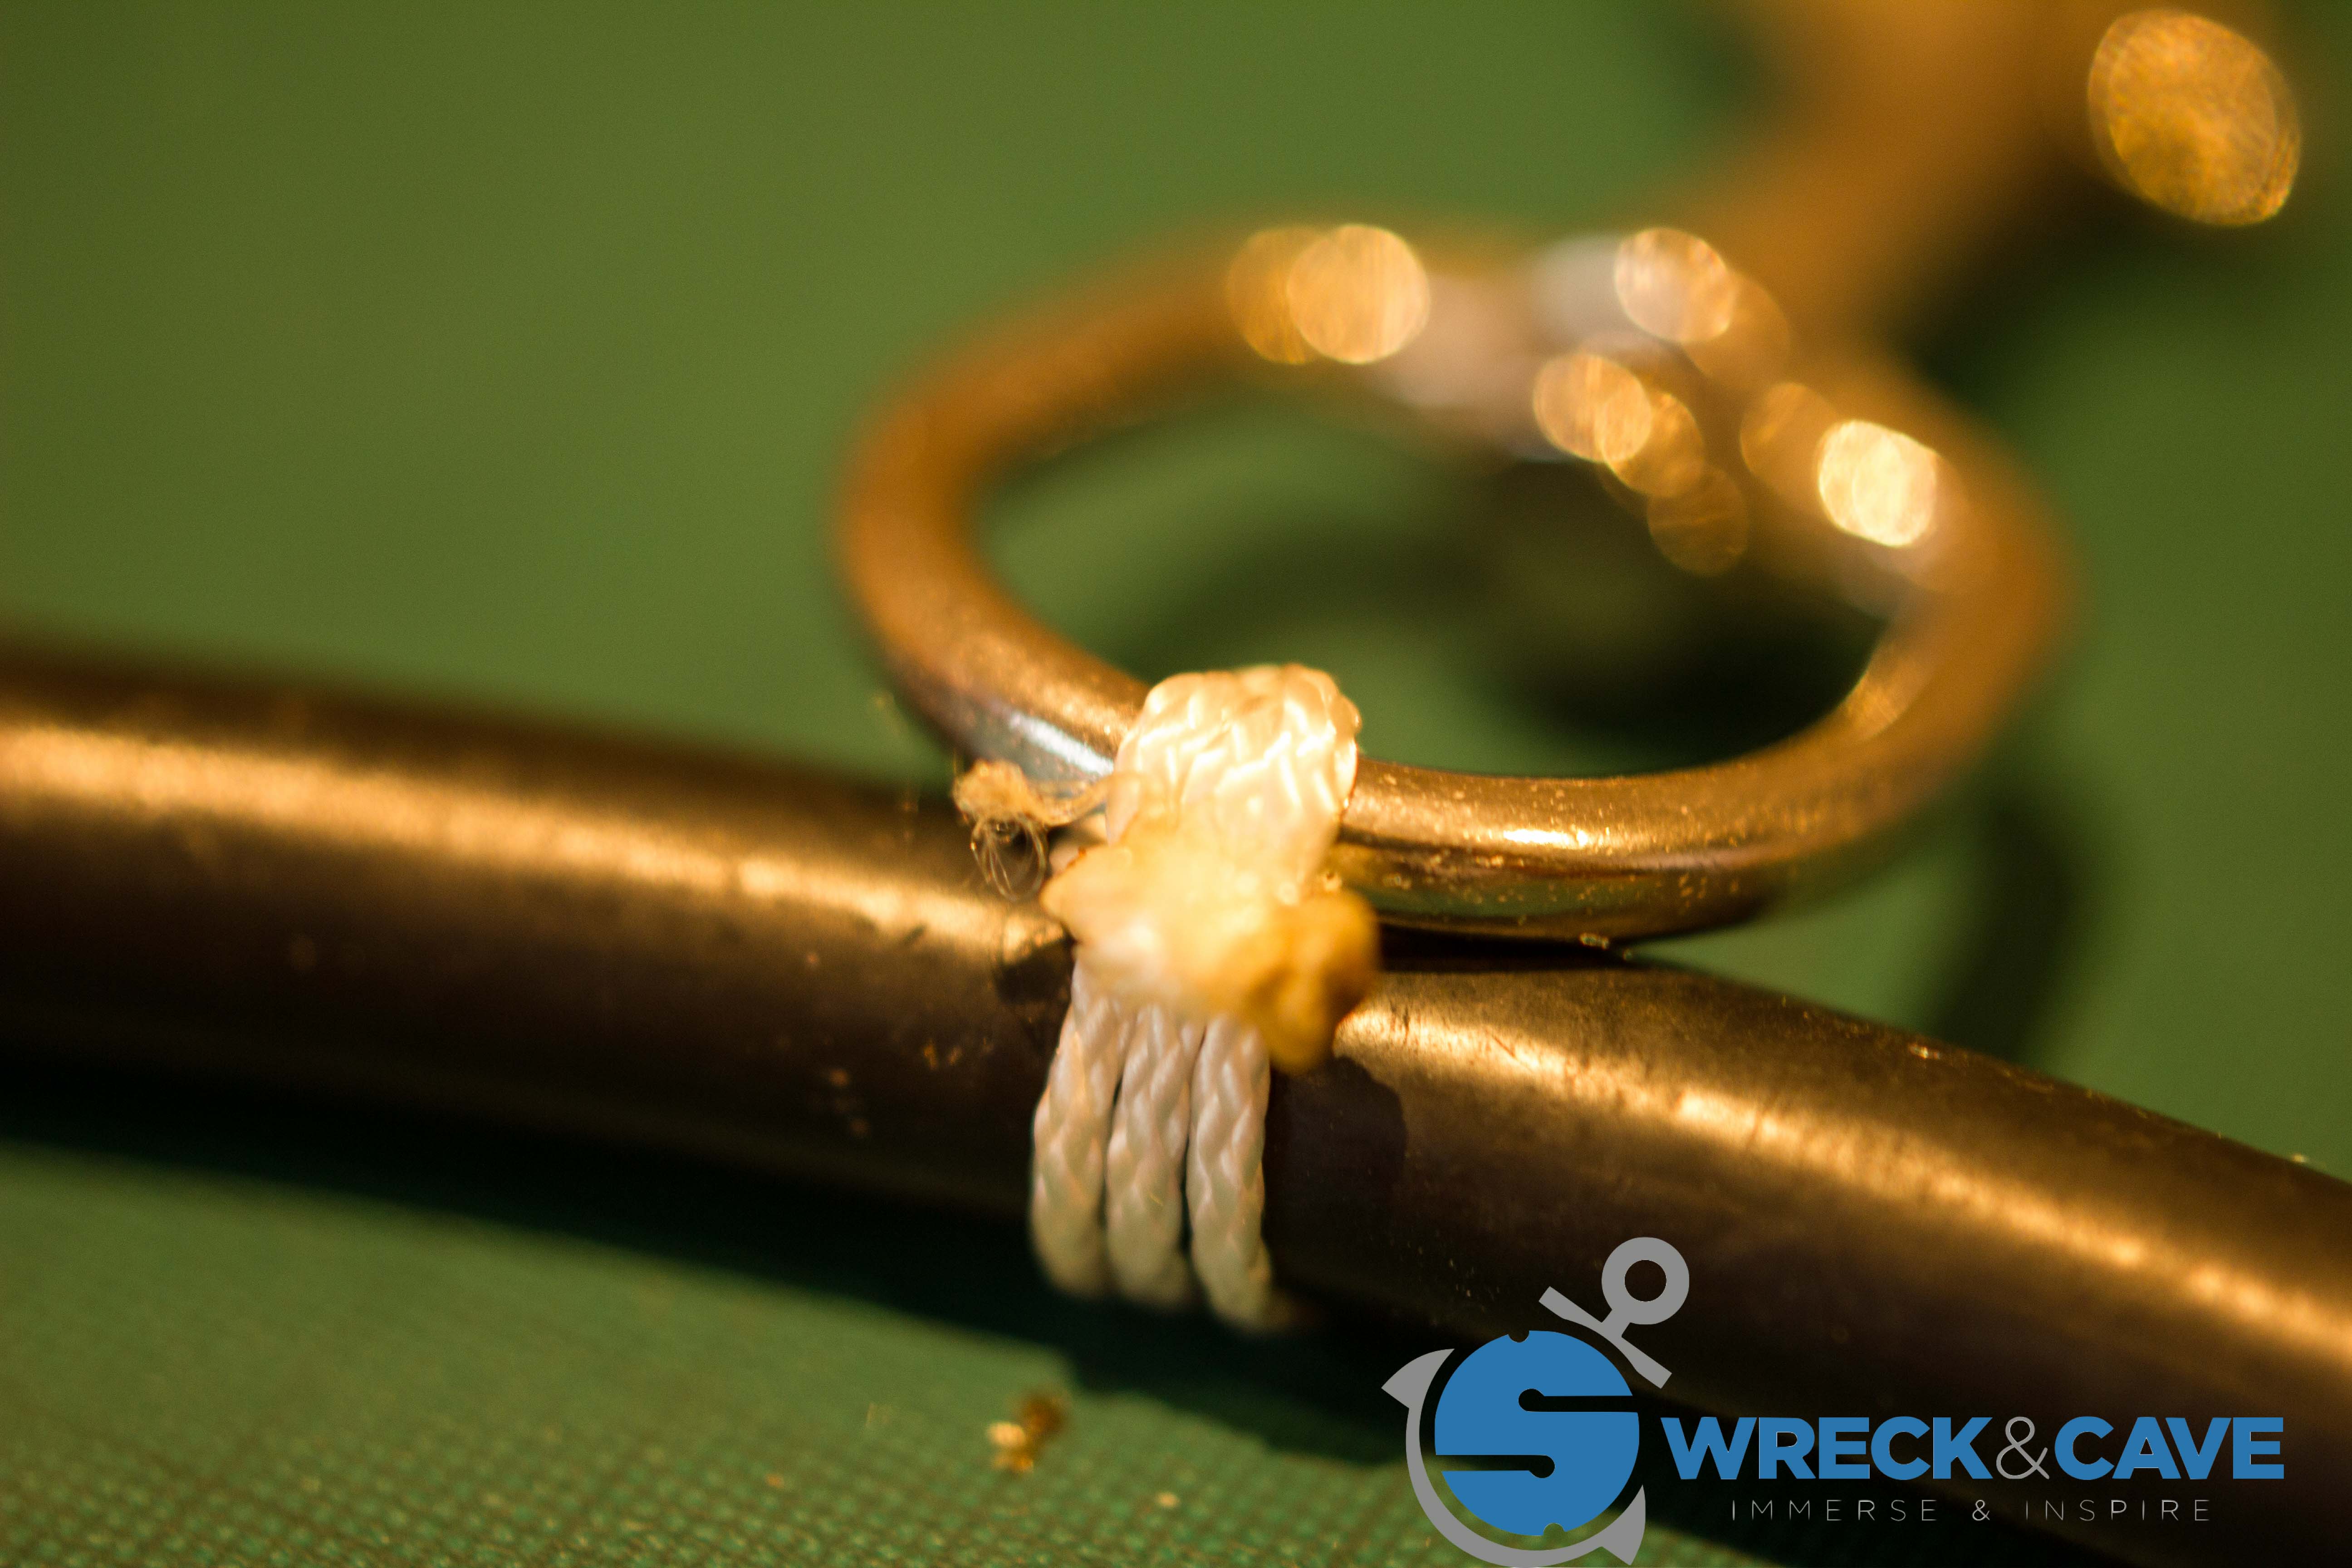
Seal the Knot
Next, trim the tails of the knot to about 1cm / 0.5″ length. Then, melt the tails and push them into the body of the knot so that it can’t come undone.
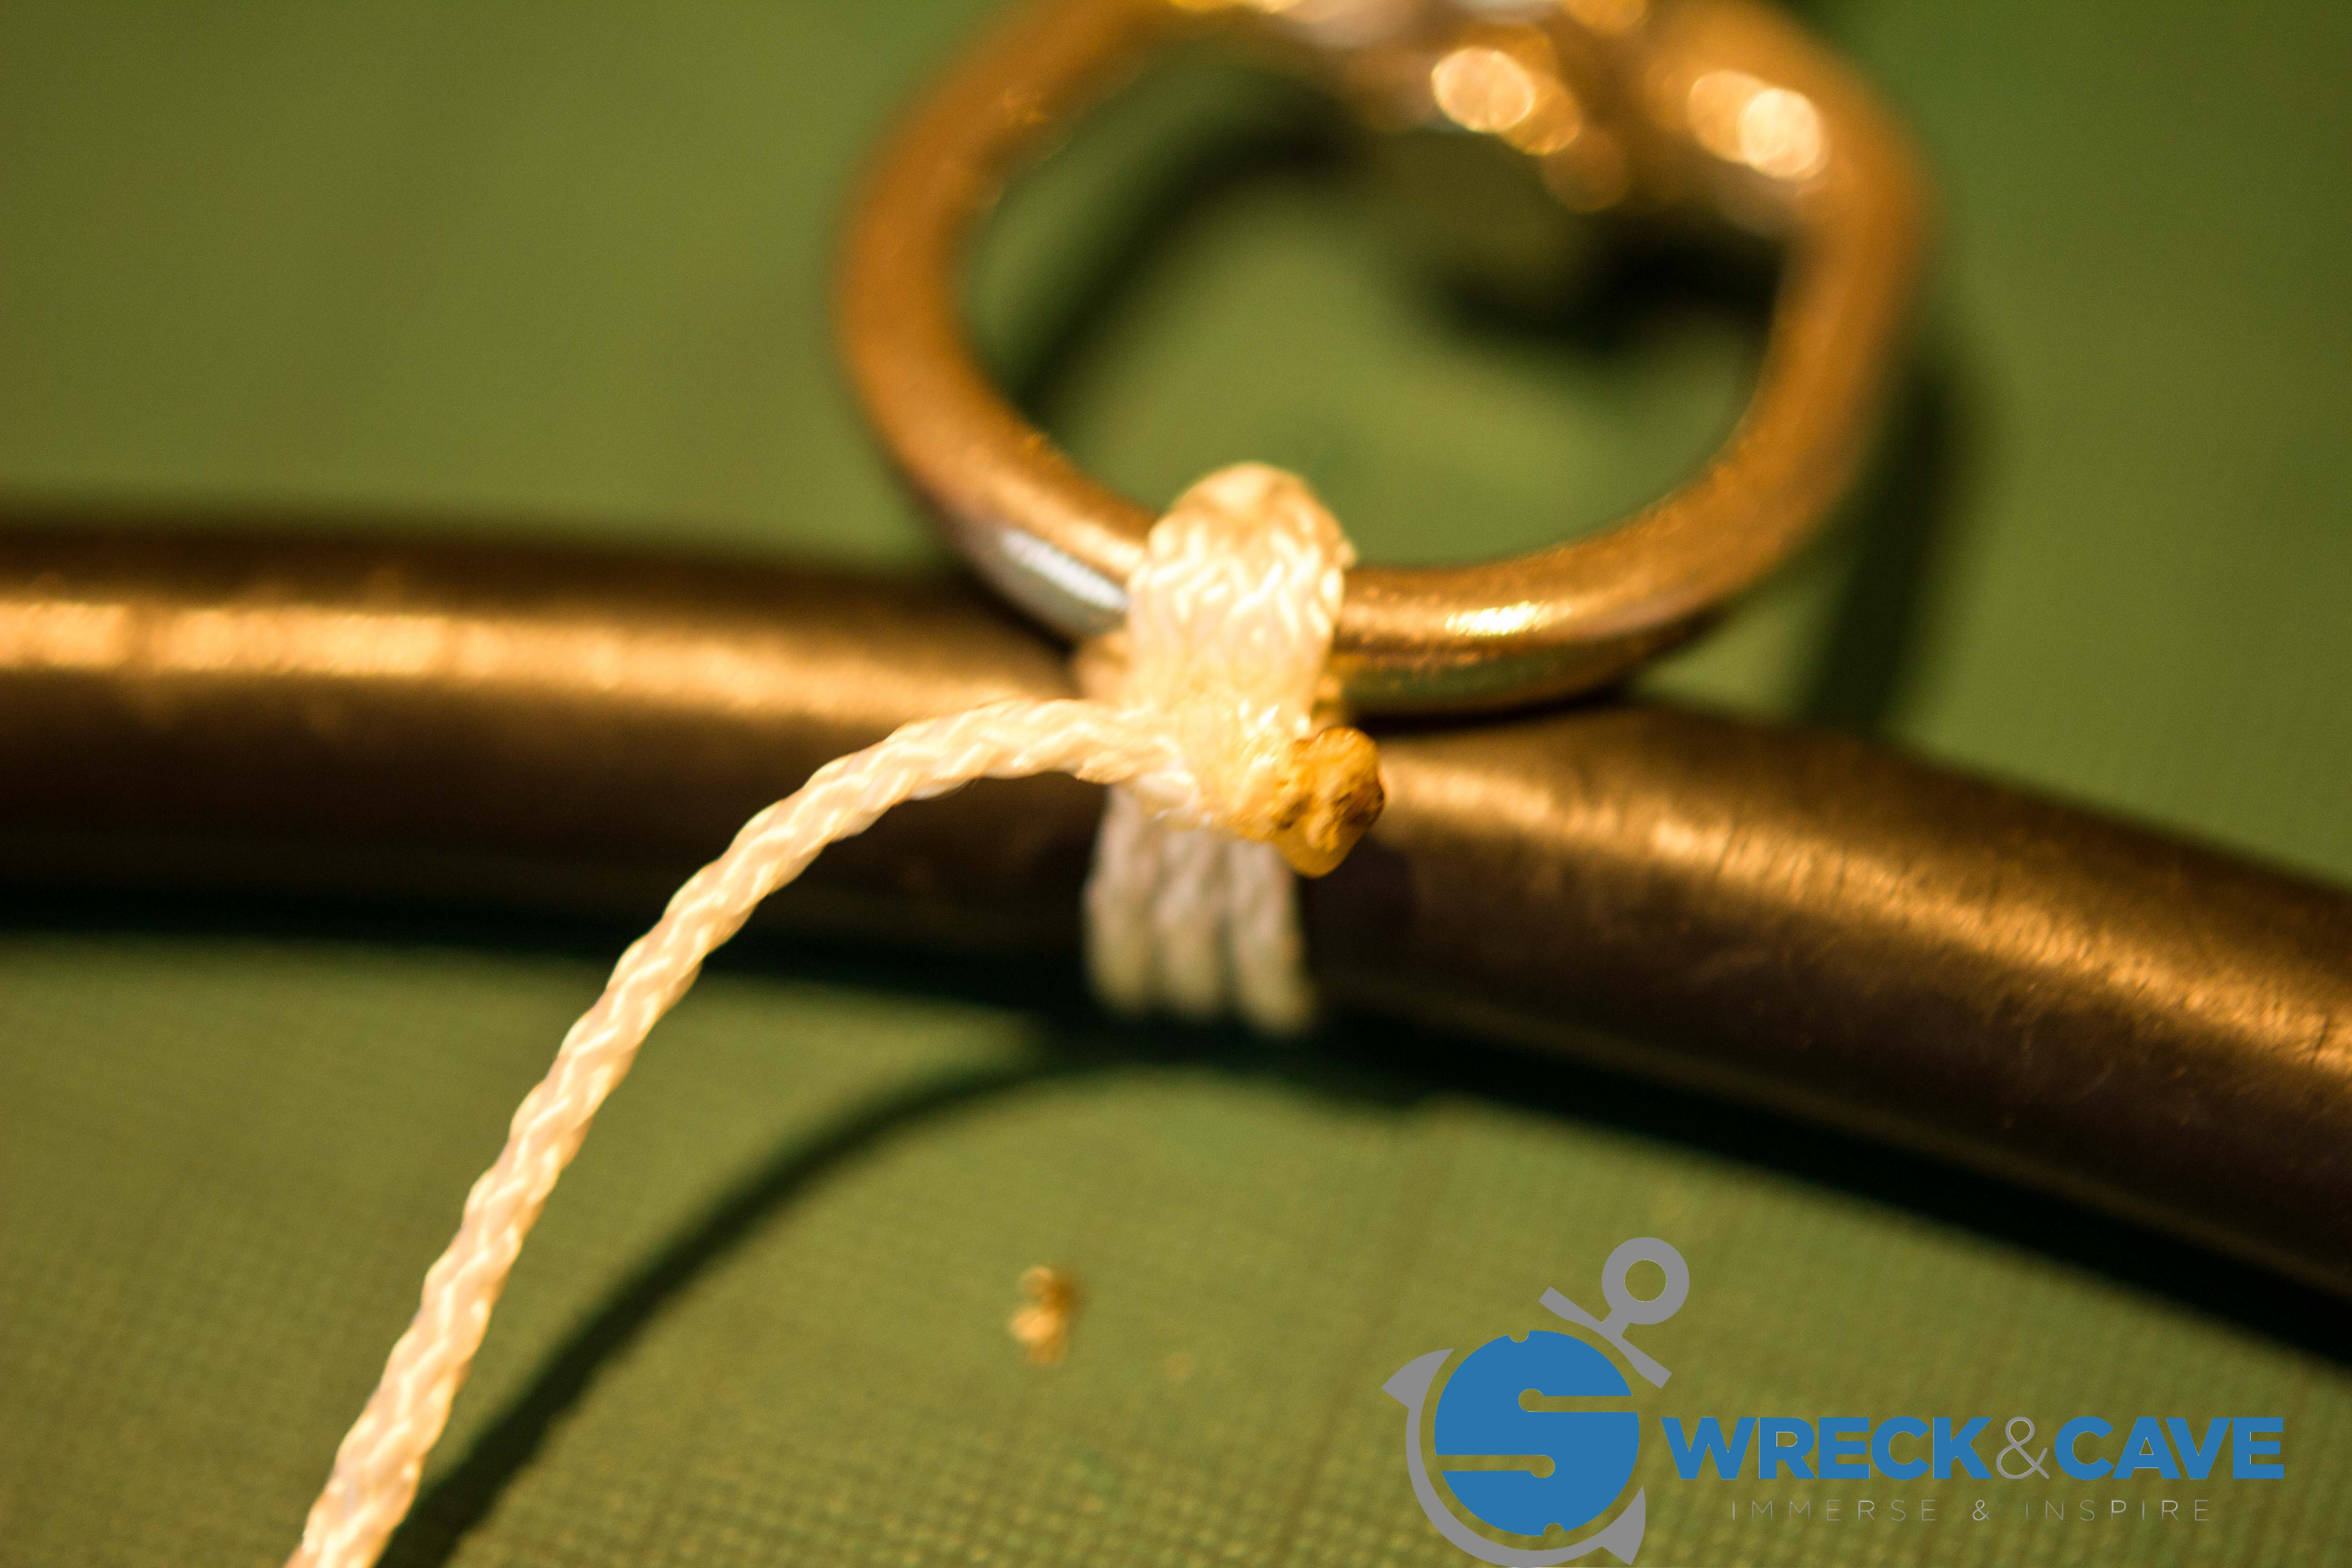
The final thing should look like this.
Job done.
If you have any questions, or you want to find out more, please feel free to leave a comment below. Or share it using the social media buttons below. That’s always a cool thing to do.