5 Steps to Setting Up Your Dry Suit Inflation System
This page is all about setting up your dry suit inflation system. You can use your main cylinder of course and this is the cheapest and most streamlined method. However, if you intend to use Helium in your diving, then a separate source of gas is needed for the suit as, to put it frankly, Helium will freeze your bits off. If you’re trying to keep warm, in a drysuit then this article will help you as well. Lots of people use suit inflation systems diving Nitrox as well, just to keep the configuration consistent, so it’s worth spending a little time going through how to set up the system. Here you’ll find all of the information and photos you’ll need to get your dry suit inflation system set up perfectly!
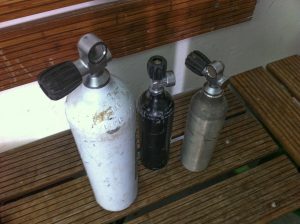
1. Choose the right cylinder
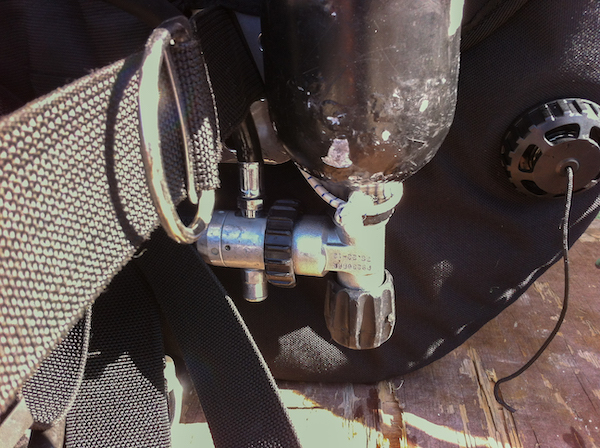
The first thing to consider is the size of cylinder you want to use. I find that the 0.8L-1L cylinders adequate for 2 30m dives, but only one 30m+ dive. For longer dives, with up and down profiles, or multiple deep dives, then you might want to consider a 1.5L or larger cylinder. We’ll start off looking at the smaller cylinders, 1L or less. These ones are usually mounted on the backplate under the divers left arm. This keeps it nice and streamlined, accessible, and there’s no danger of it tangling up the long-hose.
If you need a bigger cylinder, then the a mounting on the back-gas cylinders is best. Keep it low down on the left cylinder and use some good quality velcro straps to attach it.
As far as the material goes, I prefer the steel 0.8L cylinders. The aluminium ones are also fine, but I find that they tend to fizz a bit at the neck after a season.
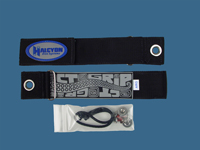
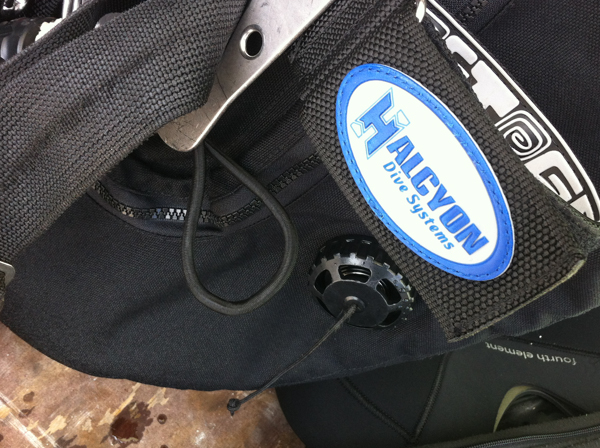
2. Get a good mounting kit
What you now need is a velcro loop that will grip the cylinder next to your backplate. Let’s put this loop on the backplate hole just above the waistband, not the one a few inches above it. This will give you the most flexibility for positioning the suit cylinder. Your mounting kit should also have a loop of bungee that you attach to the lowest hole on the plate. This allows the cylinder’s height to be set precisely where you want it. It also stop the the cylinder from “wafting around” and getting things like stage cylinders, SPG’s and so on caught on it.
3. Set the bungee to get the right cylinder position
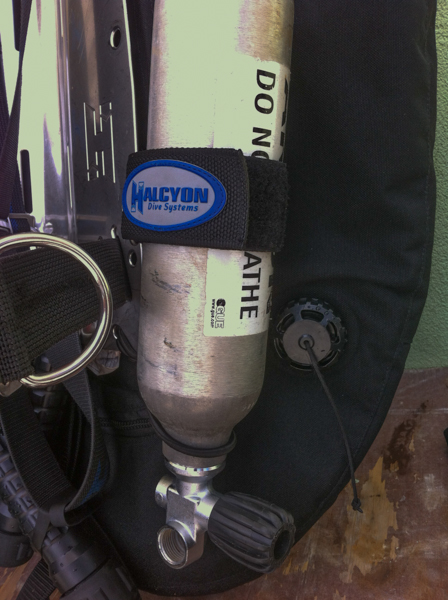
This might be the most critical step in the whole process. If you don’t set the bungee up right, the cylinder can ride too high and the regulator and valve can get trapped in the left-hip d-ring. This is about as frustrating as it gets, so you want to avoid it at all costs. Set the loop such that the “round curve” of the cylinder sits just below the bottom of the backplate. When the length of the valve is added, your regulator will be well clear of the d-ring. You can set it so that you do a “double loop” around the neck, or just a simple loop as shown. Either is fine.
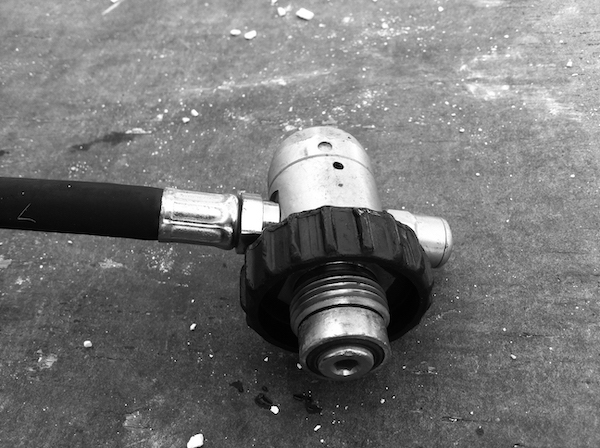
4. Regulators for your dry suit inflation system
The regulator now needs to be selected. You can use any 1st stage you like, but remember that it doesn’t have a second stage attached to it so you MUST attach an overpressure valve to it. If the high pressure seat fails (and they do), the pressure in the hose will rise to whatever is in the cylinder It’s not meant to hold that much pressure, so will probably rupture with a loud bang. In the worst case, it might free-flow gas into your drysuit, which is another bad day at the office. Put an OPV on it.
Remember that the suit regulator has no redundancy so it it fails on you because you didn’t maintain it, you’re in for a cold uncomfortable time.
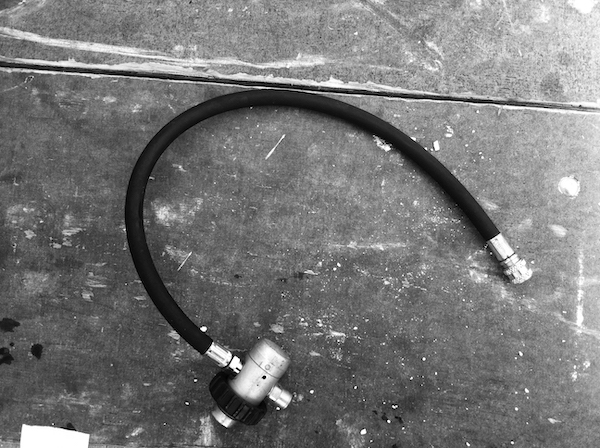
5. Hose routing for your dry suit inflation system
Hose routing is the second most important thing apart from getting the cylinder set right. This needs to be nice and clean, not liable to catching on things, and just long enough to reach from the cylinder to your inlet valve. I like to route it straight up from the regulator, under the waistband and on to the inflator valve. A 24” or 60cm hose works very well, but check it to make sure – it shouldn’t pull on the inflator or distort the position of the suit cylinder.
Depending on the type of cylinder valve you have, the orientation of the cylinder will change. Either way, the hose should go inside the waistband of the harness so that it doesn’t snag with the things attached to your left hip d-ring.

A final word of advice – always check the pressure of your suit inflate cylinder before a dive. If you forgot to fill it, then you’re in for a squeezed up, cold and uncomfortable dive. Make sure you include the valve in your flow checks or you might find yourself vacuum packed at depth and unable to reach the valve. If you run out of gas on the dive, then make sure you get the cylinder looked at. It’s not unusual to flood, particularly if you run out on descent and continue on. Water inside will be bad on several levels. Firstly, you will pump water into your suit on the next dive. secondly, you will not be able to put as much gas into the cylinder if it’s half full of water, and finally it corrodes the cylinder. Oh, and on that note, please remember to service and test them. It’s not fair to ask dive shops to fill out of test cylinders.
Excellent article.
I’ll set up mine now properly.
Thank you.