Decompression stage cylinders really can’t be that hard to use. You see pictures of divers them all the time. So really, any old cylinder you find lying around should be ideal for a decompression stage cylinder, right?
Well, if you like playing Buckaroo, then that strategy might work well for you. If, however, you prefer a more streamlined and efficient approach, then you need to read the 7 steps to using a decompression stage cylinder! Lucky for you, that’s right here. Read on.
1. Choose a Material for your Decompression Stage Cylinder
Buoyancy is one of your most fundamental skills as divers, so you don’t want to make an equipment choice that hampers your ability to hover, maintain stability, and to be correctly weighted on dives. The more overweighted you are, the more difficult it is to keep neutral buoyancy. This is because every minor change in depth has a much more pronounced effect on our buoyancy if there is more gas in the BC than if there is less. Also, should the diver suffer a failure of the BC, an ascent to the surface gets more difficult when we are overweighted. I wrote an article about proper weighting here.
As your diving gets more equipment intensive, it makes sense to try to choose items that have minimal effect on our buoyancy. With a decompression stage cylinder, the only real thing you can choose is the material of the cylinder. There’s a choice of steel or aluminium. Obviously, the weight of the gas is the same in an 7L steel or an aluminium steel, so this is not a factor, but steel cylinders tend to be always negative – they sink whether full or empty. On the other hand, an aluminium cylinder will be negative when full, and positive when empty. This means an aluminium cylinder, on average over the dive, is neutrally buoyant.
Therefore you don’t need to compensate your weighting for the stages. With a steel, you’d have to carry less weight, and then if you drop the cylinder for any reason, you’d find yourself underweighted. To put it simply, aluminium decompression stage cylinders make life easier in the water, especially as the number of stages increases.
Step 2 – Get Yourself a Rigging Kit
There are two possible approaches to rigging a decompression stage cylinder. You can simply buy a kit with all of the parts ready to go, or you can make your own. I used to make my own, but I found I spent far too long looking for all of the parts. I find it more efficient to simply buy the kit. It’s a little more expensive, but the convenience is worth it for me. You’re going to try to make one, aren’t you?
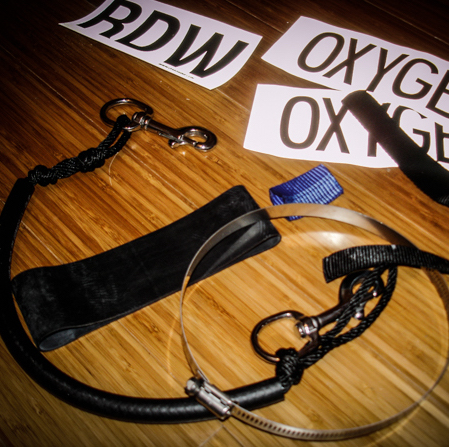
Now you’ve decided to do that, you will need the following items:
- A length of 5-6mm diameter cord, about 1.5m long
- 30cm of low pressure hose, or garden hose pipe
- A stainless steel hose clamp (diameter depending on the size of your cylinder)
- 2 boltsnaps with the 2.5cm diameter eye at the back
- 2 loops of car-tyre inner tube.
- Length of tubular climbing tape, or a racing bicycle inner tube
First things first, take the cord and fold it in half. Then pass the loop over the top of the valve on your nice aluminium decompression stage cylinder. Pull it tight against the side of the cylinder and at the point just above the end of the “rounded section”, tie a simple knot with one of the boltsnaps trapped in the knot. Or you could buy a proper rigging kit.
Then take the length of hose and thread the two tails of cord along its length so they emerge at the other end. This may take a bit of effort, and if you’re finding it hard, you can treat a piece of thinner line first, tie the cord to that and pull it through that way. Or you could buy a proper rigging kit.
Then what you need to do is fit the hose clamp. Make sure it’s the right length to go round your cylinder with no more than 2cm excess. Open it up and thread the right length of tubular tape onto it, and then close the clamp again. Pass it onto the cylinder, and pass the two ends of the cord underneath. Arrange the cord so that it sits right under the valve outlet. Tighten up the clamp and make sure the cord is now tight against the cylinder wall. Or you could buy a proper rigging kit.
Now with the two free ends of cord, thread the other boltsnap onto one of the ends. Tie a fisherman’s knot in the cord so that a 10cm tail is left hanging. Trim and seal the knot. Or you could buy a proper rigging kit.
Step 3 – What Gas Should I Use?
The choice of gas is best made by looking at your dive plan and seeing the depth range where the decompression needs to be done. You will find that on dives, up to 30m, the majority of the decompression is at 6m, with maybe the odd minute or two deeper. On a 45m dive, decompression starts to build up in the 21-9m range as well as the longer 6m stop.
One thing that is a really good idea is to standardise the gasses you use for decompression. This allows you to do a number of things. One is that you get a familiarity with your decompression schedules. The second is that you can permanently mark your decompression stage cylinders which saves you scrabbling around with duct tape and pens before the dive. See later for marking and how important it is.
So if you’re doing predominantly 30m or shallower dives, you can choose a gas that is efficient for decompression at 6m. Oxygen is a great choice here. For the dives deeper than this, then 50% nitrox is very effective. You switch to it at 21m, and then use it either to the surface if the deco is shorter than about 30mins in total. If it’s longer than that, then a second deco gas – oxygen – at 6m is a good idea.
Step 4 – Size Matters for a Decompression Stage Cylinder
Should you get a 5.5L, a 7L or an 11L? It’s a tricky question and the answer is, as usual, “it depends”! After a few seasons of decompression diving, you’ll probably end up with a range of them anyway, but lets see if we can make a sensible choice for the first one we buy. Just like with the should of which decompression gas to breathe, we’re going to look at what decompression we’re planning to do to help us choose a cylinder size.
The easy decompression is the 6m, or oxygen only decompression. Most people breathe at a maximum of 20L/min, or about 30L/min at 6m. If you’re using double 12L cylinders on your back, allowing a sensible reserve of 50bar, you will be able to spend a maximum of about 50mins at 30m, give or take a few minutes. This adds up to no more than 10 mins of decompression at 6m. Thats a grand total of 300L of gas needed. You should add about half as much again for a reserve, giving you 450L needed. Thats about a 3L cylinder. A 5.5L cylinder will give you 2 dives comfortably.
If you’re looking at a decompression stage cylinder for 50% nitrox then we need to be a little bit more involved. If you do your decompression in the GUE style, where the stops from 21-9m are all the same length, and the 6m stop is the same length as all of the 21-9m stops added up, then life is a bit easier. For example:
- 21m – 3min
- 18m – 3min
- 15m – 3min
- 12m – 3min
- 9m – 3min
- 6m – 15min
Here, you can simply consider it a 30min decompression at an average depth of 10m (2bar depth). So that requires:
20L/min x 2bar x 30mins = 1200L of gas.
Adding in the 50% reserve again, we find we need 1800L of gas. Assuming a 200Bar fill, this is a 9L cylinder which doesn’t exist, so we go up to an 11L cylinder.
For up to 40mins of deco using Nitrox 50 and oxygen, a 7L and a 5.5L work well, and for much more, the 11L for nitrox 50 is useful again. I did say you might end up with a selection of different sizes after a while!
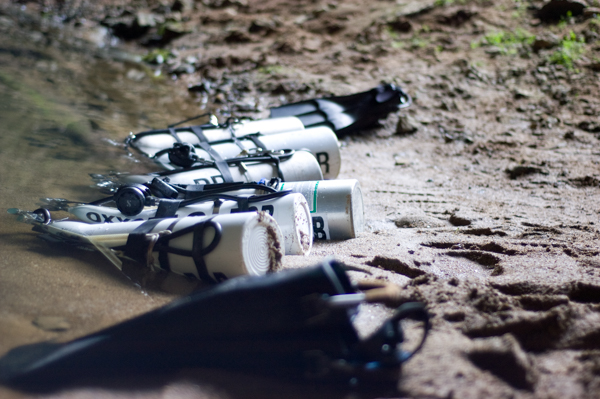
Step 5 – Mark It Up!
Poorly marked decompression stage cylinders and a weak procedure for analysing the gas within has probably played a significant part in the majority of deaths in technical diving. It’s so easy to prevent as well.
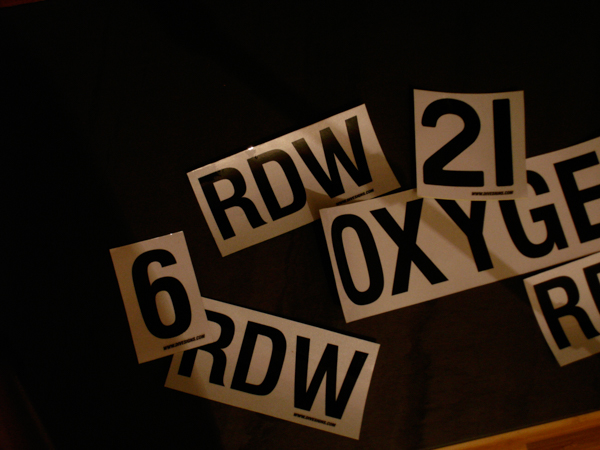
What you need to do is mark the maximum operating depth onto the cylinders. I tend to do this at stop depths, rather than in between, so it makes life a little more obvious in the water. I calculate on a ppO2 of 1.6 for decompression. For the nitrox 50, this is then 21m, and oxygen is 6m. I also use the word “OXYGEN” to make absolutely sure there’s no confusion with, say, a 36m gas or something else with a 6 in it.
These markings should be very clear, 10cm high lettering, and placed at two sites on the decompression stage cylinder. One should be on the 3o’clock position, and one on the 9o’clock, relative to the valve outlet. When the cylinder is hanging horizontally from the boltsnaps, the writing should be up the right way. This allows the depth marking to be read by a team mate from either side, and also by the diver themselves on the inside.
Always analyse your gas Do it on the day you’re going to dive. Never get lazy with this – it takes seconds and will stop you dying. I mean it. Write the analysis on a piece of tape and sign your initials on it. Stick it at the top of the cylinder on the opposite side to the valve knob. This means you can verify it’s yours when you put it on and switch to it.

As you’re going to stick to standardised decompression gasses, you can get hold of some nice permanent stickers to put on your cylinders and make them all nice and shiny, clearly marked and safe.
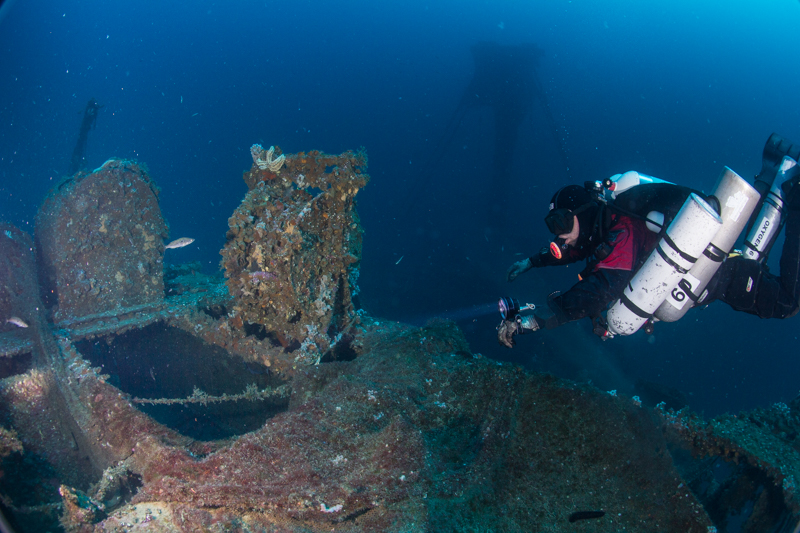
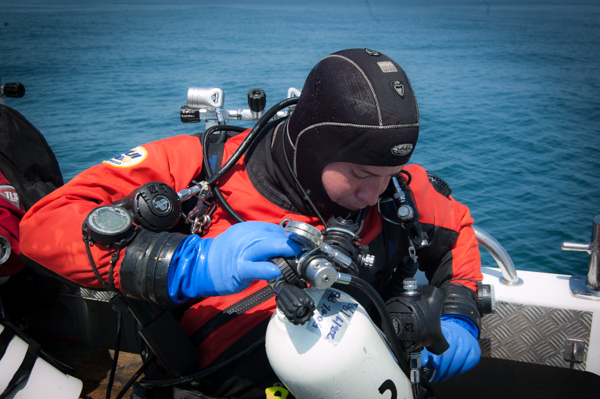
Step 6 – Put it on and take it off
A lot of people really struggle with putting decompression stage cylinders on, but there are a few simple tricks you can use to make it easier. If you’re strong enough to just force the clips into place then good for you, but sometimes a little finesse goes a long way. Assuming you’re sat on a boat bench then try the following tricks.
One way that I like, particularly if I’m using multiple stages, is to clip the bottom clips onto the hip d-ring of the harness before I get into the set. Leave the stages lying down for now. Carefully slide in, and do up the waistband and crutch strap. Then lift up the closest stage and stand it on it’s end. All you need to do then is to lean forward and place the clip onto the d-ring. No lifting needed! Do the same with the second one, although it is a little tricker to get it stood up.
You can put the twinset on first if you like too. If you do it this way, then once you’re all set up, clip the tail of a stage into the hip d-ring first. Then stand it up and repeat, as per above. The important thing is to get the tail in place first, as this stops the stage from moving around too much when you’re getting the top clip in place.
If I’m diving from a RIB, and gearing up sat on the tubes, then things get a little more tricky. Here I tend to rest the stage on its base, on the tube next to me and clip the top clip first. This prevents me from dropping it over the side, which I can assure you is both embarrassing and expensive.
One golden tip that you should try is this. Put your fins on first! Before you put on the twinset, or stages. Trying to bend over in full gear is a good way to fall over, or get all out of breath and frustrated. This is the last thing you should be before jumping into a dive.
If you’re putting the stages on in the water, then always keep a firm grip on the decompression stage cylinder using one finger through the top clip. Lift the clip up to the shoulder d-ring, open the gate, and clip it on. You might need to use your right hand to move the inflator out of the way as well.
Before you start the dive, have a feel around that hip d-ring and make sure you haven’t done anything weird. You might have clipped a stage clip into the SPG, crossed two clips or put one clip through another. This will frustrate you in the water like nothing else, so do a d-ring check and make sure it’s organised they way you like. Check all the clips are running freely on the d-ring.
Step 7 – Switching to your Decompression Stage Cylinder
The ironic thing about decompression gasses is that they are very beneficial for the decompression phase of the dive. However, they will likely kill you if you breath them on the deep part of the dive. Wrong gas at the wrong depth has killed many technical divers in the past, but some simple procedures can help reduce that risk to almost nothing. As long as you follow them…
When you get to your stop depth, be that 21m, 6m or whatever you’ve chosen, come to a stop. Stabilise your buoyancy. Leave it a few breaths to make sure you’re not going up and not going down. If you didn’t do it already, clip your light head onto your right shoulder, and tidy up the cord.
Tell your buddy or team that you intend to switch. Then with your left hand, find the decompression stage cylinder you want to use. Pull it away from your body so you can see the markings. Now confirm your depth on your gauge. That’s why it’s on the right arm 😉 Pressurise the cylinder and then turn it off again.
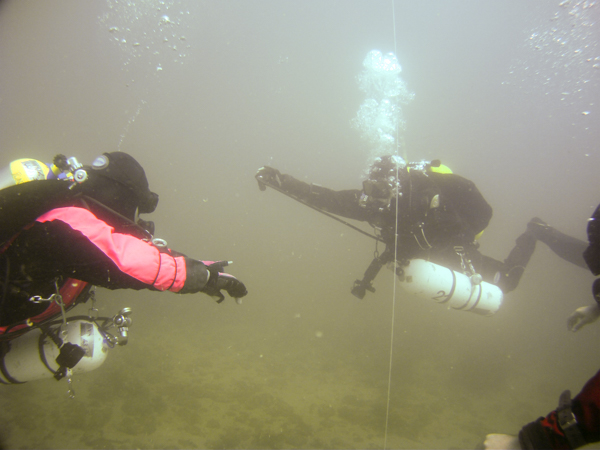
Walk your left hand from the decompression stage cylinder valve to the first stage, down the hose and onto the second stage. Gently pull out the hose and transfer the second stage into your right hand. Tap the purge button while looking at the SPG on the decompression stage cylinder. If the needle drops, you know that the second stage in your right hand is connected to the SPG and hence to the cylinder with the correct gas in it.
Confirm you’re still at the right depth, and as a final check, show the deployed hose to your buddy. Your buddy should now make a careful check that the second stage is connected via the hose to the cylinder appropriate for the depth. Then they give you the switch signal.
Loop the stage regulator behind your head and transfer the second stage into your left hand. Now remove your long hose and put the decompression regulator in your mouth. Then clip your long hose to your d-ring, and you’re done. Now just sit out the decompression!
I really hope you’re found this guide helpful. There is a lot to putting a stage regulators and cylinders together, and you should now be well armed with the tools you need to get started. Of course, formal training in decompression diving is a really good idea and you will learn a lot more about the physics, physiology and practicalities of decompression on a proper course.
I’m going to ask you a simple favour now. Would you be so kind as to do a short survey on this article for me? You can get to the survey by clicking this link. Thank you so much! As always, you can add your questions and comments below.
Very nice and extremely helpful article. Everything is thoroughly explained and reasons for the different methods are given. Also very well witten, not in a too boring speech, but entertaining and at the same time interesting and well thought. Thx a lot!
This was great! really glad GUE Singapore posted this on their site so I had the opportunity to read it.
Well done, very useful.
Wery useful
How about something on cleaning up hoses on the deco cylinder at the end of the dive before getting out of the water?
Hi,
This article is very well done !
It explained exactly the procedures to follow. ( I would even like to translate it into two other languages for my students. I couldn’t better explained it )
Bravo !
Philip
GUE Scientific Diver