Archive for the 'Articles' Category

Upcoming GUE courses

Below is a list of my upcoming GUE classes.

24th - 28th May, 2010. Tech 1. Underwater Explorers, Portland, UK. FULL
29th - 31st May, 2010. DPV 1. Underwater Explorers, Portland, UK. SPACES
1st - 5th June, 2010. Tech 1. Sardinia, Italy. FULL
20th - 24th June, 2010. Tech 1. Underwater Explorers, Portland, UK. SPACES
8th - 11th July, 2010. GUE Fundamentals. Vobster Quay, Somerset. SPACES
15th - 18th July, 2010. GUE Fundmentals, Underwater Explorers, Portland, UK. SPACES
18th - 22nd August, 2010. Tech 1. ScubaDiveWest, Galway, Ireland. SPACES

If you want to know more, just give me a shout!

Rich

Things to look for in a drysuit
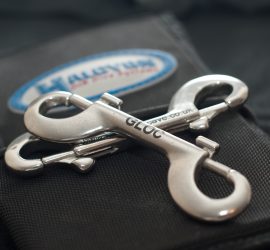
DUI suit features

DUI TLS 350The information on this page is not specific to the DUI TLS350, but it is in our opinion the most versatile drysuit in the world today. It is well fitting, allows a full range of movement, and is extremely hard wearing. We’re going to talk through the features of this suit, and explain why it is such a good choice.

Front entry zipper and protector

DUI ZipperDry sealing zippers are expensive items. Therefore the shorter you can make the zip for a dry suit, the cheaper it will be to manufacture. As a consequence, the back entry drysuit is a popular choice as it requires a shorter zipper. The downsides are unfortunately are many, and often unforseen. Firstly, the stiff zipper across the back reduces the mobility of the diver and can limit the divers ability to reach valves - a vital requirement for all divers. Secondly, the ability of a diver to dress themselves is compromised. We’ve all seen divers being zipped into and out of their own suits.

DUI suits come with the option of either a back entry or a front entry (self donning suit). Here at Wreck and Cave we strongly recommend the self donning version, the same as we use in our own diving. The DUI self donning suit comes with a zipper protection layer, incorporating a second, regular, zipper. This protects the dry zip from abrasions in and out of the water.

Braces

DUI BracesEveryone who has every dived a dry suit has got out of the water after a dive and, rather than completely remove the drysuit, has removed themselves to the waist. This often has the unfortunate result that the suit falls down when we walk around. Braces, attached at the belt level on the inside of the suit, allow us to walk around out of the water without tripping up on our sleeves!

Telescoping torso

The telescoping torso feature of a DUI suit is related to a self donning suit. To put these suits on, the torso of the suit needs to be a little taller than the diver, so that we can put our arms into the suit first, and then place the neck seal over our heads. Once the neck seal is in place, we are left with an excess of suit material. A DUI suit folds this material at the waist level, and constrains it using a small crotch strap.

This actually has a hugely beneficial effect, in that it allows the diver great reach and mobility as the excess material is released as the diver stretches, and then retracts as the diver relaxes. Valve shut downs will never be easier.

DUI had patents on the internal braces and telescoping torso for many years, but these have now expired. You will see these features copied on other suits, but the manufacturers rarely understand all the reasons behind their use, so they often don’t work as well as the original DUI version. Beware of cheap imitations!

Seams

DUI seamsAnyone who’s owned a drysuit for any length of time will know that, unless you rip a hole in it, it will eventually start to leak at the seams. DUI drysuits are glue sealed, which is much more flexible than the usual tape used on most other suits. This results in a longer lasting suit. DUI are so confident in this seam technology that they offer an 8 year warranty on the integrity of the seam. If you’re considering another brand of suit, ask if they’ll match that.

Dump valves

DUI dump valveYou put gas into the suit as you descend to eliminate the suit squeeze. So on ascent, it needs to come out right? DUI offer a range of dump valves - Apeks high profile, low profile and also the Scitech valves. All of this is irrelevant if the valve is in the wrong place. DUI suit dump valves are placed on the outside of the left arm. Not on the side, not under the arm, not in a fold of loose fabric. Dumping excess gas on ascent is then easy as the valve is always at the highest point in the suit, it floats away from the undersuit and allows a clear path for the gas to exit.

Days of bashing the dump valve to vent, wrapping your arm in duct tape to prevent it jamming the valve, standing vertically upright in the water and other such remedies are a thing of the past with a well placed dump valve on a well fitting suit.

Warm neck collar

DUI Warmneck collarOur bodies pump around 20% of our blood up to the head, and most of this goes through the carotid arteries in the neck. Having a cold neck is a great way to get your whole body cold. It’s why we wear scarves in winter! Underwater, a scarf isn’t really a viable option, so DUI have come up with the warm neck collar. This allows the heck of your hood to be tucked into a neoprene flap on the suit that sits over the top of the neck seal. The amount of water flushing around the neck area is dramatically reduced, and the diver remains warmed for longer.

It sounds like a gimmick, but it really does work.

DUI suit options

In addition to the standard features described above, there are a range of extra features that you can choose to have added to your suit. Depending on your application, you can add them in, or leave them off.

Pockets

An instructor once asked me if I have any trousers that don’t have pockets. I did at the time have one pair, but I never wore them, because they didn’t have pockets! I now cannot imagine having a dry suit without pockets. There would be nowhere to keep SMB’s, spools, wetnotes and the host of other things I carry with me on a dive.

DUI offer a range of pockets, but the cargo pocket is the best. It’s a very simple device, big enough to hold all the stuff you need, and the top closes with a velcro flap, meaning that it will close on its own if you forget, unlike a zipper pocket.

H pocket 1There is another option, and that is to add a Halcyon pocket. These are truly marvelous objects, if you can describe a pocket in such a way. There are so many nice touches. Starting with the velcro opening.

H pocket 2Built in to this is a small pocket, with ready-fitted attachment loops. Useful for cave line arrows, spare boltsnaps, basically anything small that you don’t want to end up at the bottom of a big pocket.

The main pocket compartment comes with bungee loops already installed. Also, a small, low profile inner pocket is included for sliding wetnotes in and out without emptying the rest of your pocket, or getting them jammed when replacing them.
These are seriously nice extras to have on your suit, and you will not regret the extra cost.

H pocket 4H pocket 5

Boots

DUI offer two variants of boot. Both are low volume, reducing the possibility of “floaty feet”. The choice comes down to Rock Boots and the more traditional Turbo soles. Rock boots comprise a simple compressed neoprene sock that is attached to the drysuit. Once the suit is donned, the diver then puts on a tough outer boot, the Rock Boot. These are very tough and if you do a lot of diving involving clambering over rocky shores or rough terrain then this boot suit be considered.

The turbo sole is essentially a neoprene sock, with a stiff sole attached. It is meant to be close fitting and is designed for in-water use. Rough terrain does not suit it so well, as your foot will slide around inside the boot, which may damage the neoprene if you roll onto sharp rocks.

In water, the turbo sole is by far the best, having low volume and no laces to come undone. The rock bot by its nature is larger than the turbo sole, so some divers may find they need bigger fins to accommodate the boot.

P-valve

Halcyon P valve“P-valve”, “overboard discharge valve”, call it what you will. It enables you to urinate while in the water. This is invaluable on long dives, and has important safety value or more challenging decompression dives, as the diver can maintain full hydration, and even drink during the dives, without risking soaking the suit from the inside, so to speak. The Halcyon valve is a nice compact unit, fully balanced, and easy to use. No more crossed legs on the deco stop!

Zip seals & gloves

DUI Zipseal 1This is probably one of DUI’s finest innovations. The failure of a dry suit seal most often happens as the diver is putting on the suit. That generally means that the dive is cancelled until a repair can be effected. The Zip seal allows a diver to carry a spare set of seals, and simply swap one out if it fails. The technology is similar to that used on “ZipLock” bags, and the new seal can be in place within minutes. The technology extends to dry gloves as well, and it is possible to install gloves to the suit, again in a matter of minutes. The Zip seal can also be installed on the neck.

DUI Zipseal 2Many people are justifiably sceptical about these seals, and fear that they will leak, or worse, come apart underwater. It’s difficult to persuade that they won’t, but the true test is to try and pull a set apart. Almost impossible. They have to be removed by “peeling” the seal away from the mounting ring on the suit, and the presence of the divers wrist makes this impossible while the suit is being worn.

Knee pads and crotch pad

Reinforcement around the knees is nice for those of us that spend time kneeling on the bottom, loading up with stage cylinders and scoters, for example. Also, the crotch pad allows increased protection if you use a scooter a lot. These are nice options for a suit, and will add years to the life of a suit if you dive in aggressive environments.

Streamlined Equipment

Nobody ever saw a fish swim on an angle in the water, or an aeroplane fly at a 45 degree angle. The reason is obvious – flying or swimming like this makes us use more energy to move from one place to another.

As diver, we want to enjoy our time in the underwater world, so it makes sense to make our movement as easy as possible, so that we don’t get worn out or tired before time. Remember that the harder we work, the more we breathe as well, so a good streamlined diver is going to be able to spend more time diving than one that is always fighting against their body position and equipment. If we have a long swim to do it becomes even more important to be flat and efficient, so that we can achieve our goals.

The equipment we choose, and how we arrange it, has a big effect on our streamlining in the water. There are basically two ways of improving a divers streamlining. The first is to maintain a flat, horizontal, position in the water. The second is to think about how the equipment is placed on the body, and how it will add to our drag. We’re going to concentrate on the second aspect, equipment placement.

A horizontal divers head and shoulders will be breaking the water first, as they swim forward. Consequently, we want to place as much of the extra equipment that we can effectively in the area of water that is in the “shadow” of the head and shoulders. If we can “hide” the equipment there, then it won’t add much to the drag. Obviously, a cylinder can’t really go under your arm, so that has to go on the back of the diver. Let’s look at the rest of the equipment.

Streamlined diver

Buoyancy compensator
A backplate and wing type of BC has very little extra volume; the wing itself sits snugly next to the cylinder. There is no extra “clutter” in the chest area, and the harness straps are smooth to the body.

Lights
The canister type lights have a small light head, held in the hand. The battery packs can be quite bulky, so we place this on the waistband of the BC. It’s pushed back against the backplate, and it consequently sits under the arm, where it isn’t in the flow of water, and consequently doesn’t add to the drag.

The backup lights are clipped to the harness, and snug up under the arm as well, so you don’t even notice they’re there. Even though they’re small, if they dangle around off the body, they will contribute to the overall drag.

Hoses
Hose routing can add a surprising amount of drag to a diver. If you don’t believe it, fill a bathtub, and with a loop of low pressure hose in your hand, feel the amount of drag produced when you pull it through the water. So, what we do is to route the hoses such that they contribute as little as possible to the drag.

This starts by choosing a regulator that allows the hoses to be routed downwards, parallel and close to the cylinder. Next, we try to keep the hoses as short as possible (without compromising their utility). The high pressure hose needs to be around 56-61cm long, depending on the first stages and whether you’re using single or twin cylinders. The back-up regulator is frequently too long on many divers equipment, and it tends to extend over the right shoulder. It should come over the right shoulder, close to the neck while allowing full movement of the head when in use. A 56-61cm length hose, depending on the first stage and cylinder configuration, is usually about right.

Pockets
All of the rest of the equipment we use on a dive needs to be carried, so we need a place to store it all. An instructor of mine once asked me if I had any trousers without pockets in them. I thought I was being clever when I said that I did, so he then asked me if I ever wore them. To which the answer was, of course, no. Trousers without pockets are pretty much useless – you have nowhere to keep your stuff. OK, I hear the women now saying that that they have trousers without pockets, but you have handbags. And handbags don’t like getting wet!

So, our diving suit, be it dry or wet, needs to have pockets too keep or things in. These are best placed on the sides of the thigh. They need to be high enough so that we can get to the bottom of them without bending double. They go on the side to keep out of the flow and not act like water scoops when we swim, or drag if we’re close to the bottom.

I tend to keep all sorts of things in pockets – DSMBs, spools, wetnotes, line arrows, shears, spare double enders and anything else I might think I need on a dive. It doesn’t matter how full they are, it doesn’t add too the drag. Compare that with clipping everything to the harness – it would be very messy. Put some loops of bungee cord in the pockets, and clip everything to the loops. That way, if you can’t find something, you can empty the whole pocket, and select what you want, without risking losing anything.

Streamlined equipment configuration

Summary
Basically, try and keep all of your equipment as tidy as possible. Keep hoses short, and running down the length of the body as much as possible. Try to keep the chest area free. Try not to let equipment dangle down where it will catch on things. Use your pockets, and practice pulling things in and out of them. Remember that if something has to be carried, try and place it where it won’t add to the overall drag.

Balanced equipment - what does it mean?

I frequently get asked how much weight a diver will need for diving a particular equipment configuration. It seems like an easy question, but not many people are aware of how to select equipment, and then how to choose the correct weighting for that configuration. Most people will be familiar with the concept of carrying enough weight to hold a short stop at 6m, with very little gas in their cylinders, and with an empty buoyancy compensator. This allows a diver to hold a decompression stop in the event of having run out of gas. It essentially identifies the minimum amount of weight needed to conduct the dive, and is tuned to the end of the dive. This is an important aspect of the weighting process.

grace-90ft_0157.jpgHowever, there is an often-overlooked aspect of weighting, and that is weighting at the start of the dive. At this point, we are at our heaviest, as we are carrying gas in our cylinders, and we are dependent on the buoyancy compensator to achieve neutral buoyancy. Should this now fail (elbow coming away from the bladder, or the inflator unit malfunctioning) we run the risk of becoming negatively buoyant. The first thing that we should do is to ensure that our BC has sufficient lift to maintain neutral buoyancy at the start of the dive. It really doesn’t need to be much bigger than that, other than to maintain decent floatation if you hang around on the surface in a swell after a dive.

It should be fairly easy to see that failures at the start of a dive can be just as concerning as running out of gas at the end of the dive. We need to be very careful in our equipment choices to avoid placing ourselves in a dangerous situation. For example, very heavy cylinders such as a set of 300Bar doubles, full of gas, would cause us a lot of trouble should we experience a wing failure. A lighter set of doubles, such as aluminium 80’s would be much more buoyant and possibly a better choice.

rhea-turtle_0086.jpgAnother consideration is the use of wetsuits. These require a large amount of weight to sink them at the surface, but once at depth, they compress, and loose their buoyancy. Consequently, the weight we needed at the surface is now effectively “dead weight” at depth. Again, the failure of a wing may leave us no option but to ditch some of this weight. This may then make the ascent less controlled than we would otherwise like.

The combination of heavy steel cylinders and wetsuits start to become a very unattractive option.

Up until this point, the discussion has been rather subjective. I’d like now to try and be a bit more scientific about the whole thing. We can start to do some rough calculations to see how different equipment configurations would affect our buoyancy in the water at both the start and end of the dive. They way we do this is to categorise each piece of our equipment (and gas supply) as either positively buoyant, or negatively buoyant.

Negatively buoyant Positively buoyant
Steel cylinders Wet / dry suit
Backplate Wing gas
Breathing gas
Weightbelt

We need to make sure that at all points in the dive the negatively buoyant components are balanced by the positive ones. This concept is sometimes referred to as a “balanced equipment configuration”. So the next step is to start applying some real numbers to the table above to see what happens. We’ll stick with a wetsuit example for the time being.

Negative equipment Buoyancy Positive equipment Buoyancy
Steel 12L cylinder 2kg 5mm wetsuit 12kg
Backplate 3kg Wing gas 15kg - see working
Breathing gas 3kg
Weightbelt 7kg - see working

We now need to calculate how much weight we should carry. Remember that this is done with no gas in the wing, and an empty cylinder. The Total negative buoyancy comes to 2+3=5kg, and the total positive buoyancy is 12kg.

So we need to carry 12-5=7kg on the weightbelt.

At the start of the dive, we need to offset all of the negative buoyancy (15kg). 12kg of this comes from the suit, and the remaining 3kg from the wing. This will increase at depth, to a maximum of 15kg (assuming wetsuit is compressed to nothing). So 15kg lift wing is all that we need.

OK, now we move on to looking at what happens if the wing fails at the start of the dive. On the negative side, we have: 2+3+3+7= 15kg, and 12kg of positive buoyancy.

That makes us 3kg negative, which should be possible to handle, dropping the weightbelt if necessary. Now, if this occurs at depth (say 30m), when the suit is compressed to 1/4 of its thickness, we can re-do the calculations.

Negative equipment Buoyancy Positive equipment Buoyancy
Steel 12L cylinder 2kg 5mm wetsuit 3kg
Backplate 3kg Wing gas 0kg
Breathing gas 3kg
Weightbelt 7kg

Suddenly we find ourselves 15kg, negative, and only 3kg positive, a discrepancy of 12kg. This is going to be very difficult to manage at depth, and highlights the need to choose equipment with care. We can ditch the weightbelt to make us 6kg negative, but this would still be a strenuous swimming ascent. A solution could be to use an aluminium cylinder, which has a positive buoyancy of around 1kg.

This would make the negative buoyancy 3+3 = 6kg (weightbelt dropped), and the positive 1+3 = 4kg, leaving us with 2kg negative buoyancy. While not being pleasant, this should be manageable by a competent diver.

This example highlights the dangers of using thick wetuits with steel cylinders, and the working through shows you how to go about “balancing” the configuration. Try playing with the numbers and see what you get. For example, try working out what would happen if using a set of double 12L cylinders instead of a single.

You should find that it becomes increasingly difficult to manage a full wing failure as the amount of gas you carry increases. For this reason, dives utilising a drysuit for these kinds of dives is recommended. Firstly, as the dives need more gas, you are likely to be spending longer in the water, so thermal considerations begin to dictate drysuits. Secondly, a good tri-laminate drysuit will not change its buoyancy characteristics with depth, so the problems associated with wetsuit compression are eliminated. Finally, the drysuit can act as a secondary source of buoyancy in the event that you do have a wing failure at depth, and this will allow you to manage your ascent.

Lets just run that through the planning table again:

Negative equipment Buoyancy Positive equipment Buoyancy
Steel 12L cylinder 2kg Drysuit & undersuit 8kg
Backplate 3kg Wing gas 3kg
Breathing gas 3kg
Weightbelt 3kg

Look at the difference in the wing gas requirements - because the suit doesn’t compress at depth, the large 15kg required for the heavy suit is reduced to 3kg. You’d probably still elect to use a larger wing, purely for surface buoyancy though.

So, from this, you should be able to see the importance of correct equipment selection. Don’t go changing bits of your equipment, particularly ones that are substantially negative or positively buoyant without first considering the effect of the balance of your overall equipment configuration. Likewise, when purchasing equipment, make sure that it will work well with the equipment you currently have, and that you are not going to compromise the overall performance of your gear.

If you’re unsure about how any of this works in a real-world example, then feel free to get in touch, and I’ll try and work through the problem with you.

How to tie the perfect boltsnap

I often find myself showing people how to tie boltsnaps to backup lights and hoses, so I thought I’d try and write a description of how I do this. There are a number of ways of doing it, but this is the one I use – it works just fine.

This is the thing were trying to produce. It needs to be nice and tight so that it doesn’t slide on the hose, and help the boltsnap “stand up” to make it easier to clip onto the harness d-rings. The same knot is used on backup lights, but it doesn’t have to be quite as tight.

So, you will need the following things:
1. 60cm of cave line
2. A boltsnap (!)
3. The hose or light
4. A pair of cutters or a sharp blade
5. A lighter

Start by putting three turns through the boltsnap and the hose. Then pull the loops tight.
Next we want to start the knot. We’re going to put a turn around the loops which will apply tension to them, and lock the boltsnap in place. The first step is to cross the two loose ends. Pass the end in the right hand over the end in the left so that it looks like this.

Next, we’re going to tie a knot on the other side to lock the knot. Flip the boltsnap over from the right hand side in the image above to the right hand side. Pull the two loose ends of line over to the right hand side.

The next step is to tie a reef knot to secure the knot. Start by pulling the loose ends to tension the turns. It takes a bit of practice to get this set right, but essentially you want the turns to be pinching together behind the eye of the boltsnap, but not touching.

Tie the first half of the reef knot and it should look like this.You can make fine adjustments to the tension at this stage.

The next step is to tie the other half of the reef knot. Remember that for a reef knot, it ties “right over left, then left over right” otherwise it’s a granny knot and won’t be stable.When the knot is pulled tight, the reef knot should look square and symmetrical.

To finish, melt the knot so that it can’t come undone. Be careful not to melt through the line. Melt the ends of the line, and mushroom the ends with the end of the lighter to flatten them out.
The final thing should look like this.
Job done.